Administration
Admin Dashboard
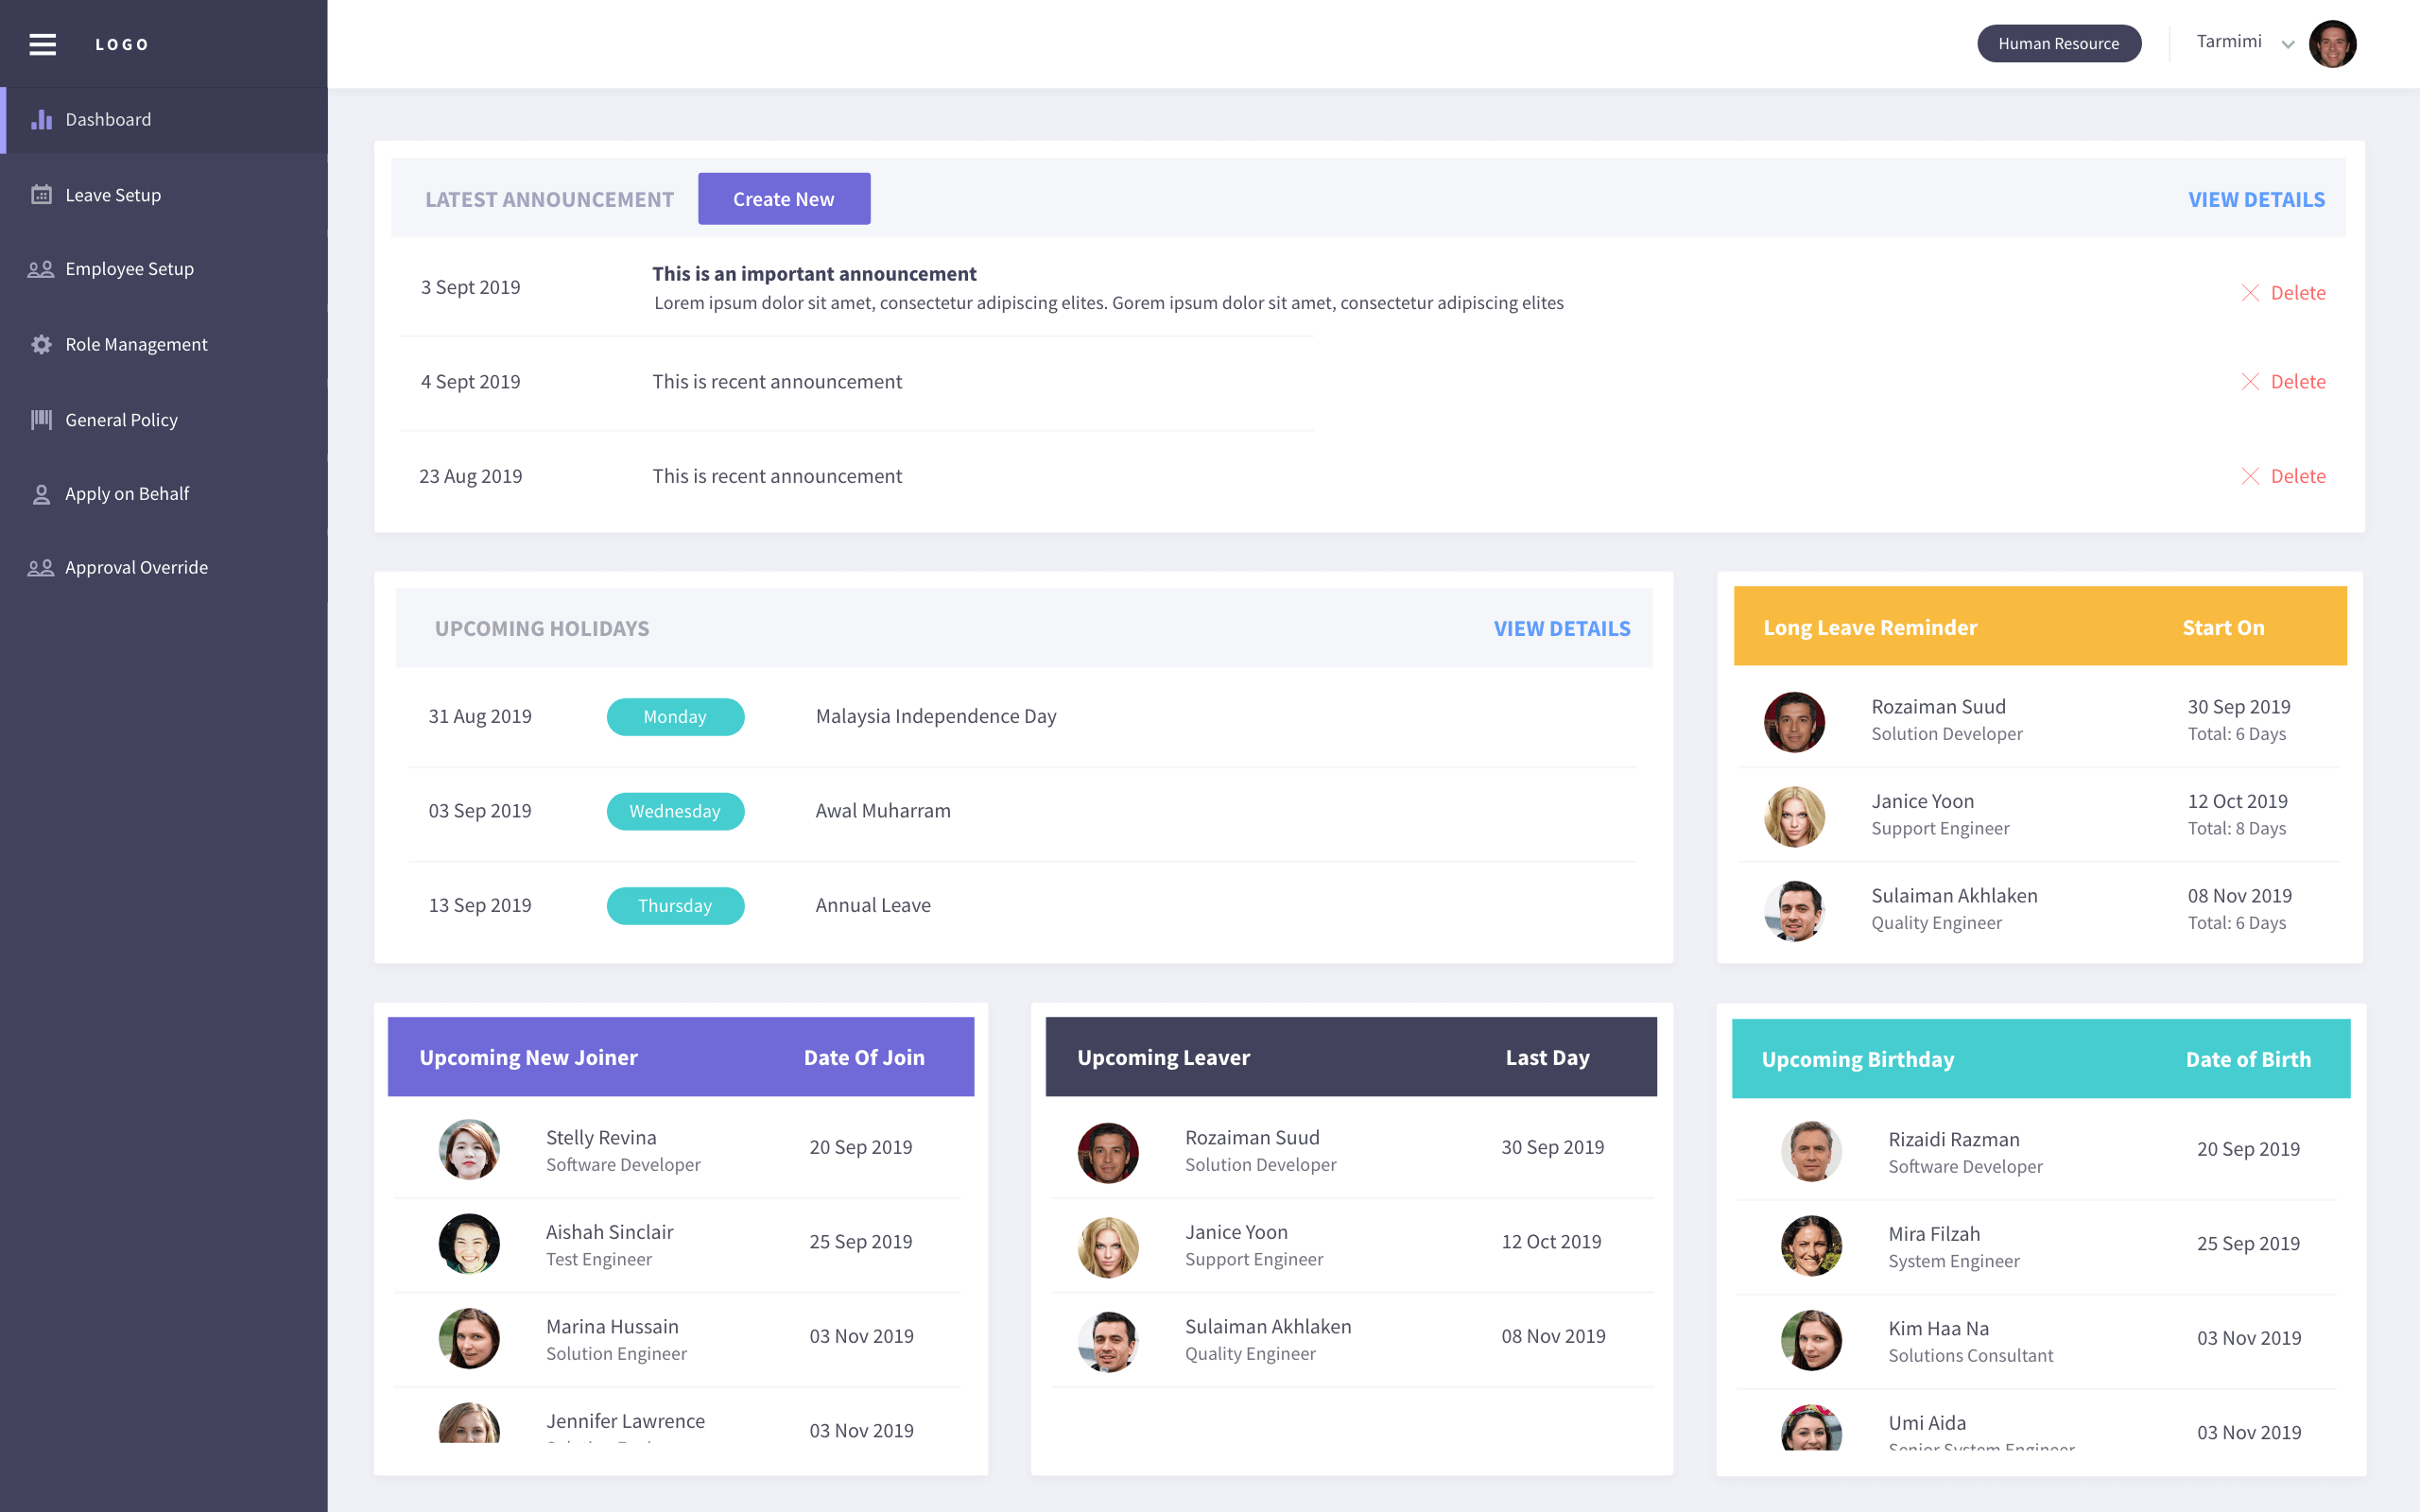
This page will show the details of latest announcement created by administrator and upcoming holiday, birthday, new joiner & leaver. There will be a long leave reminder information too. Administrator able to manage announcement by create, edit and delete features.
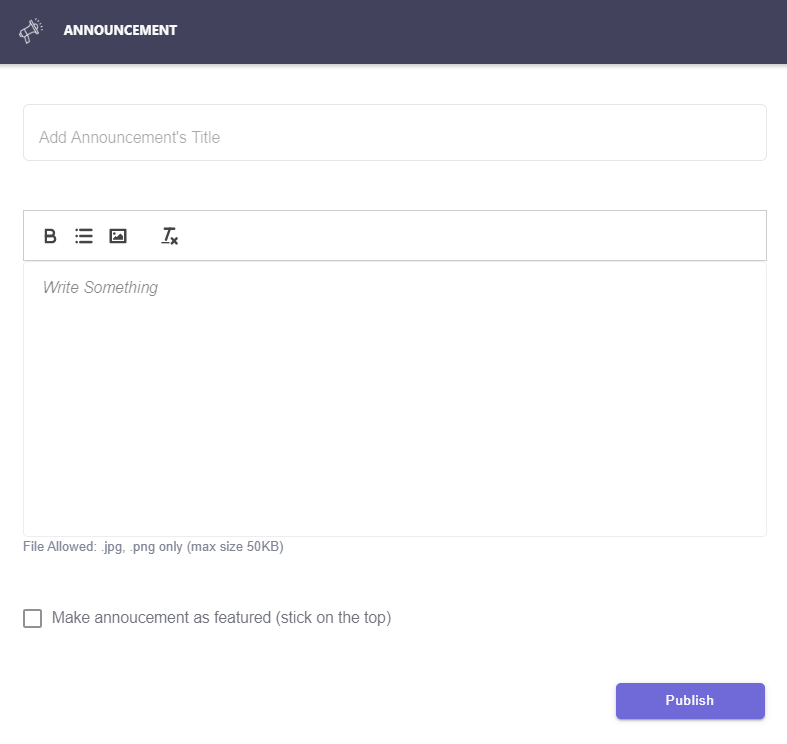
Create announcement
Click on the Create New button to write new announcement.
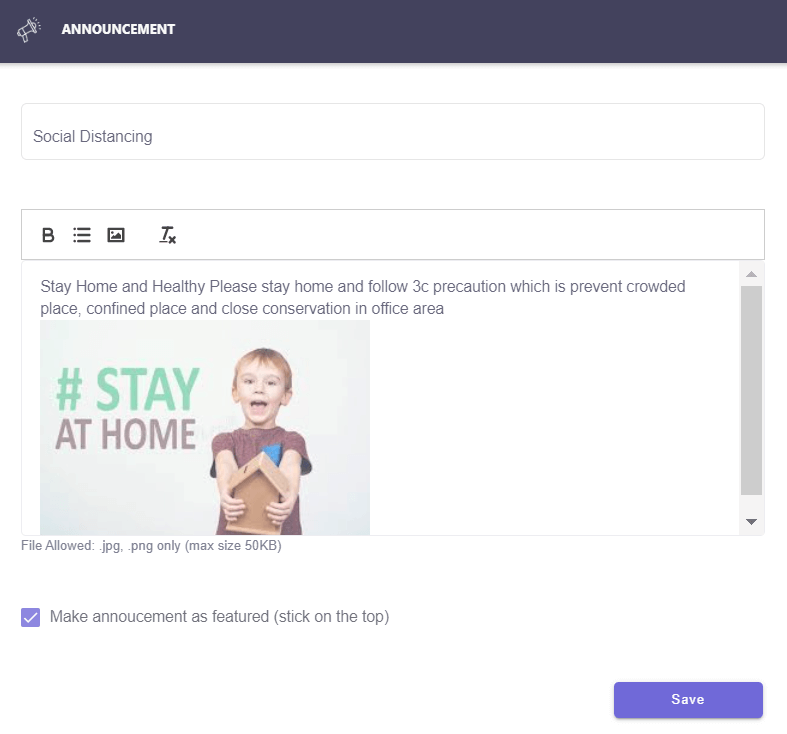
Edit announcement
Click on the edit icon of the selected announcement to do the changes.
Delete
Click on the delete icon to remove unwanted announcement.
Leave Setup
Calendar Profile Setup
Create specific public holiday and rest day for employee.
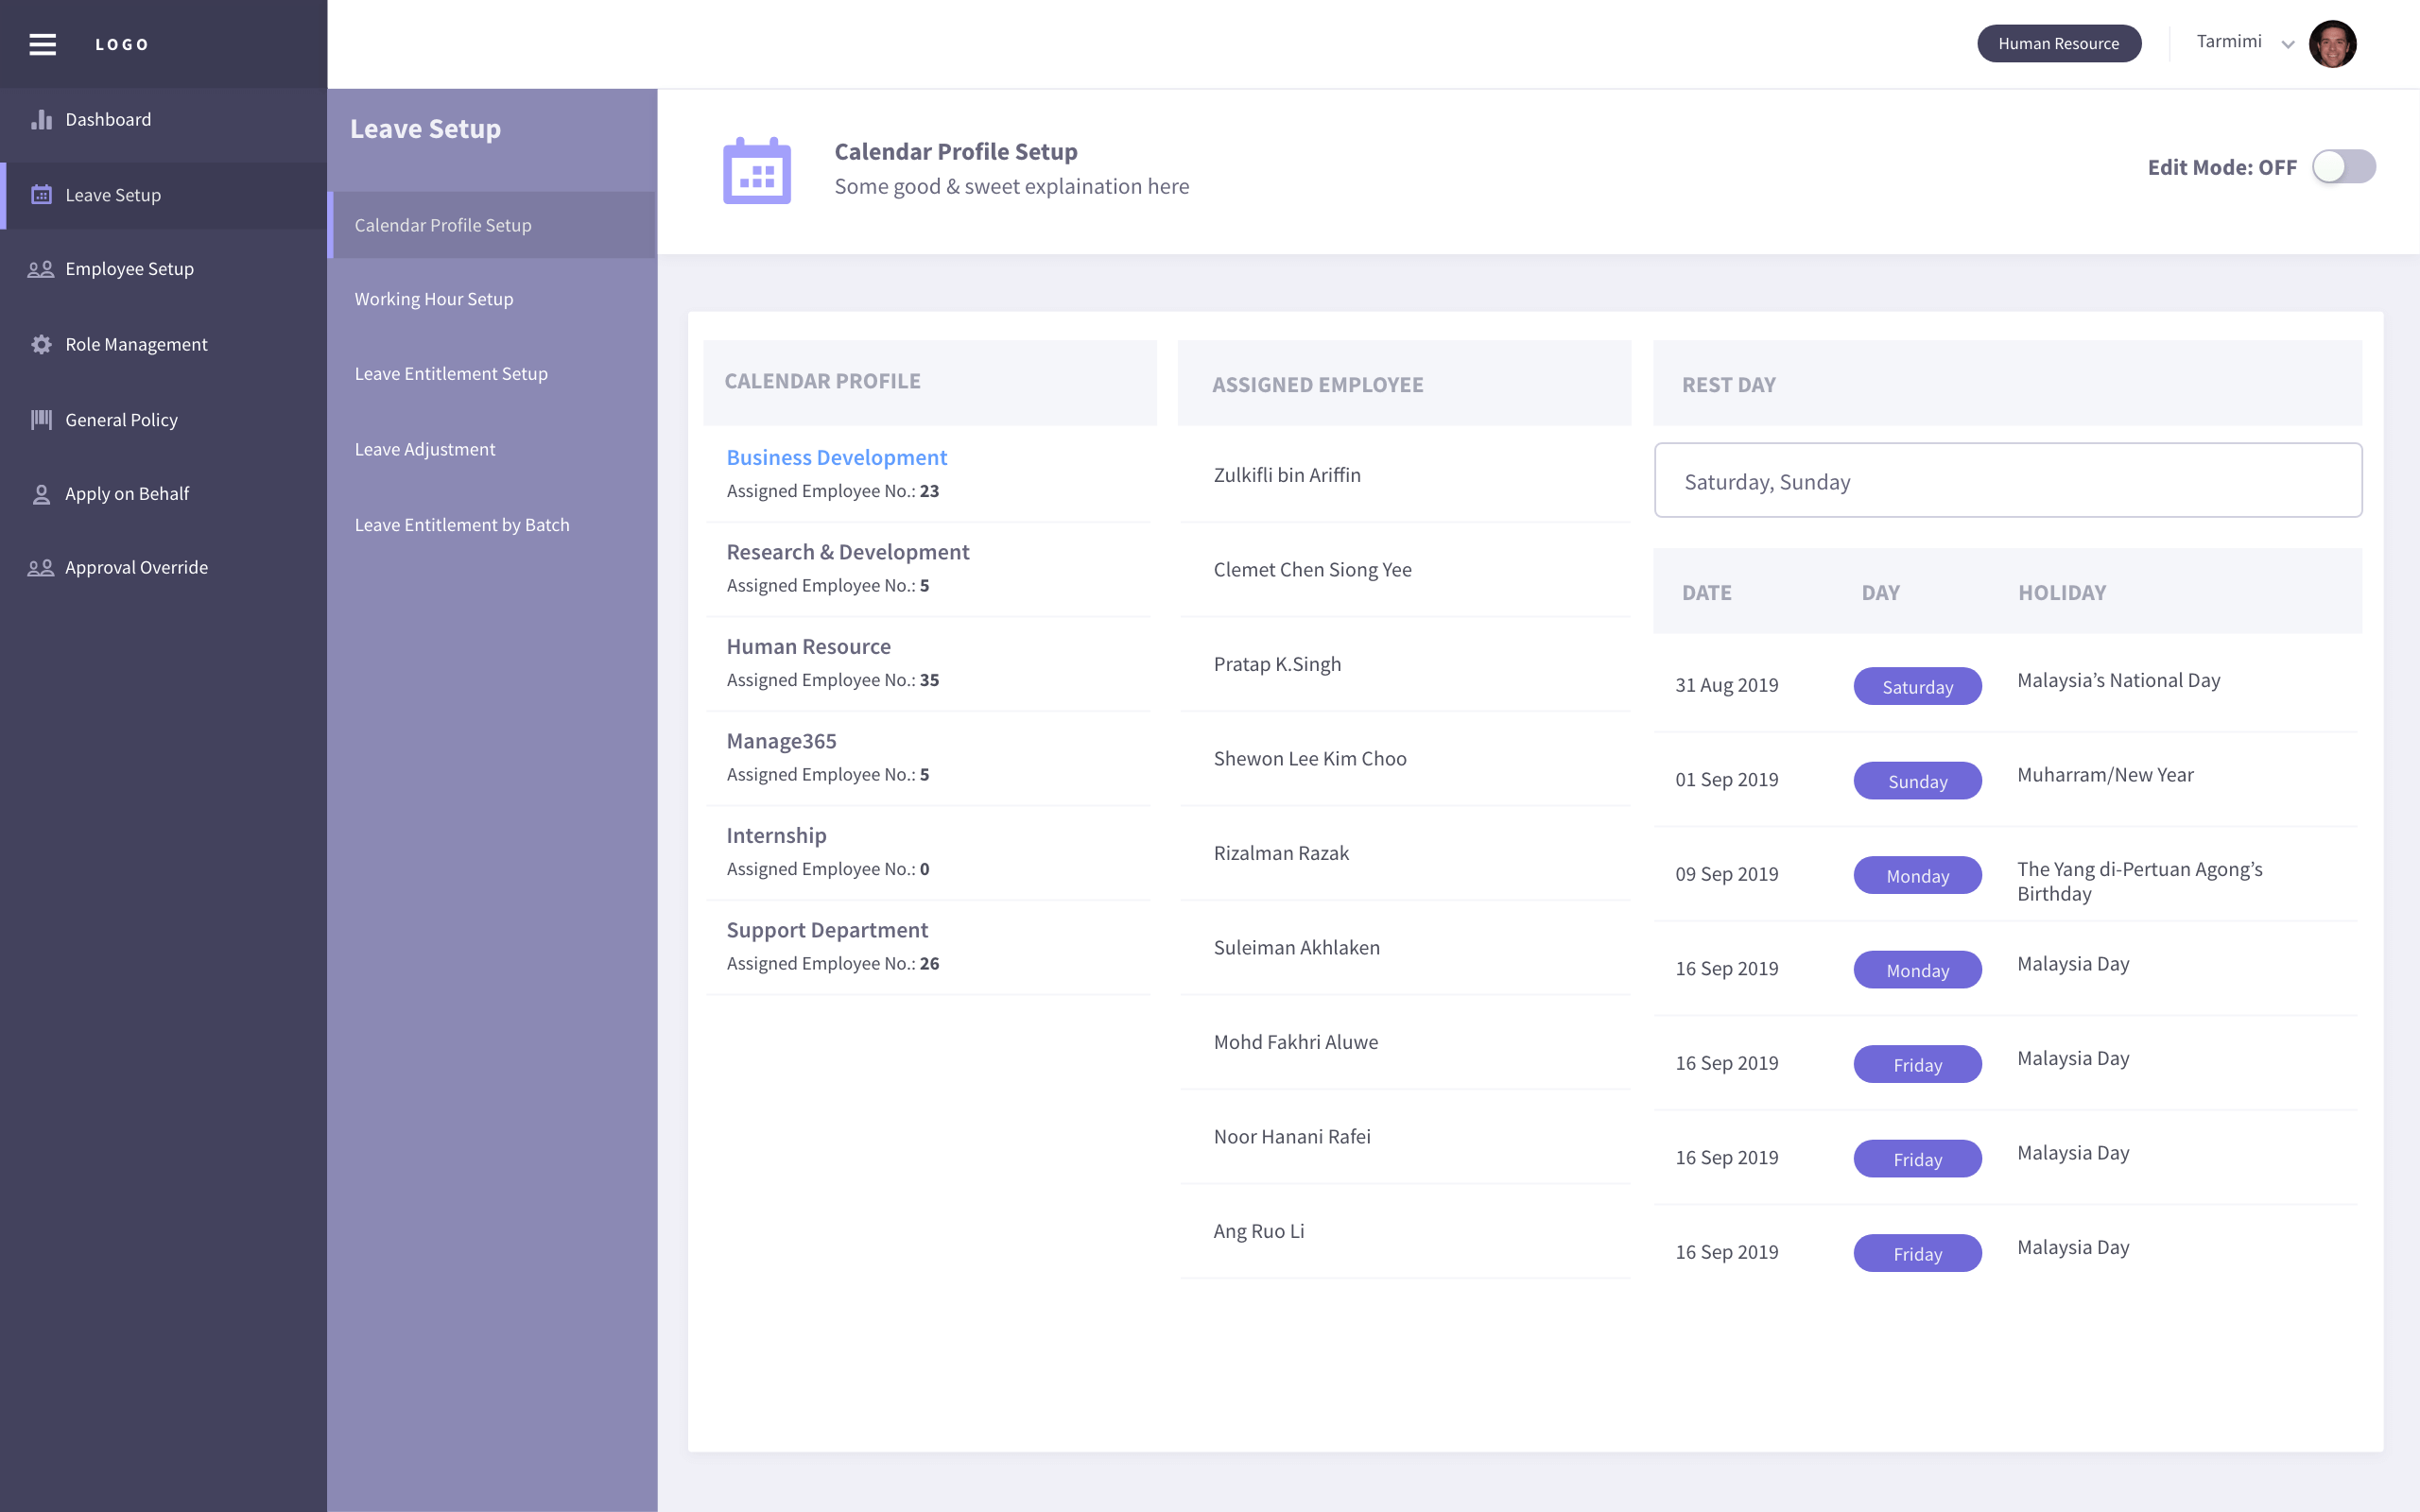
Toggle Edit Mode to ON to create or edit calendar profile. There have few features as listed here:
Create new calendar profile
Click on the add icon at the calendar profile column. Fill up the mandatory calendar profile name in the slide-in menu. Others field is optional. Click create to save as new calendar profile.
- NOTE:
Tick set as default calendar profile will replaced the original calendar profile.
Edit calendar profile name, rest day & public holiday
When the Edit Mode is toggled ON, simply edit calendar profile name, change rest day and public holiday. All changed data will be saved when toggle OFF Edit Mode.
Delete calendar profile
Click on the trash icon at the calendar profile column to delete unwanted calendar profile permanently.
Assign user by using drag & drop individual or bulk
To move only one employee
Drag an employee from the assigned employee card and drop it to another calendar profile card. The assigned employee list is updated after dropped.
To move multiple employee
Select or tick multiple of employee and click on the ellipses (three vertical dots) icon. Move all the selected employee to another selected calendar profile.
Set as new default calendar profile
The shaded star icon is represented current default calendar profile. To change or replace current calendar profile. Click on the unshaded star icon and click Yes button in the confirmation pop-up.
Working Hour Profile Setup
Create office working hour for employee
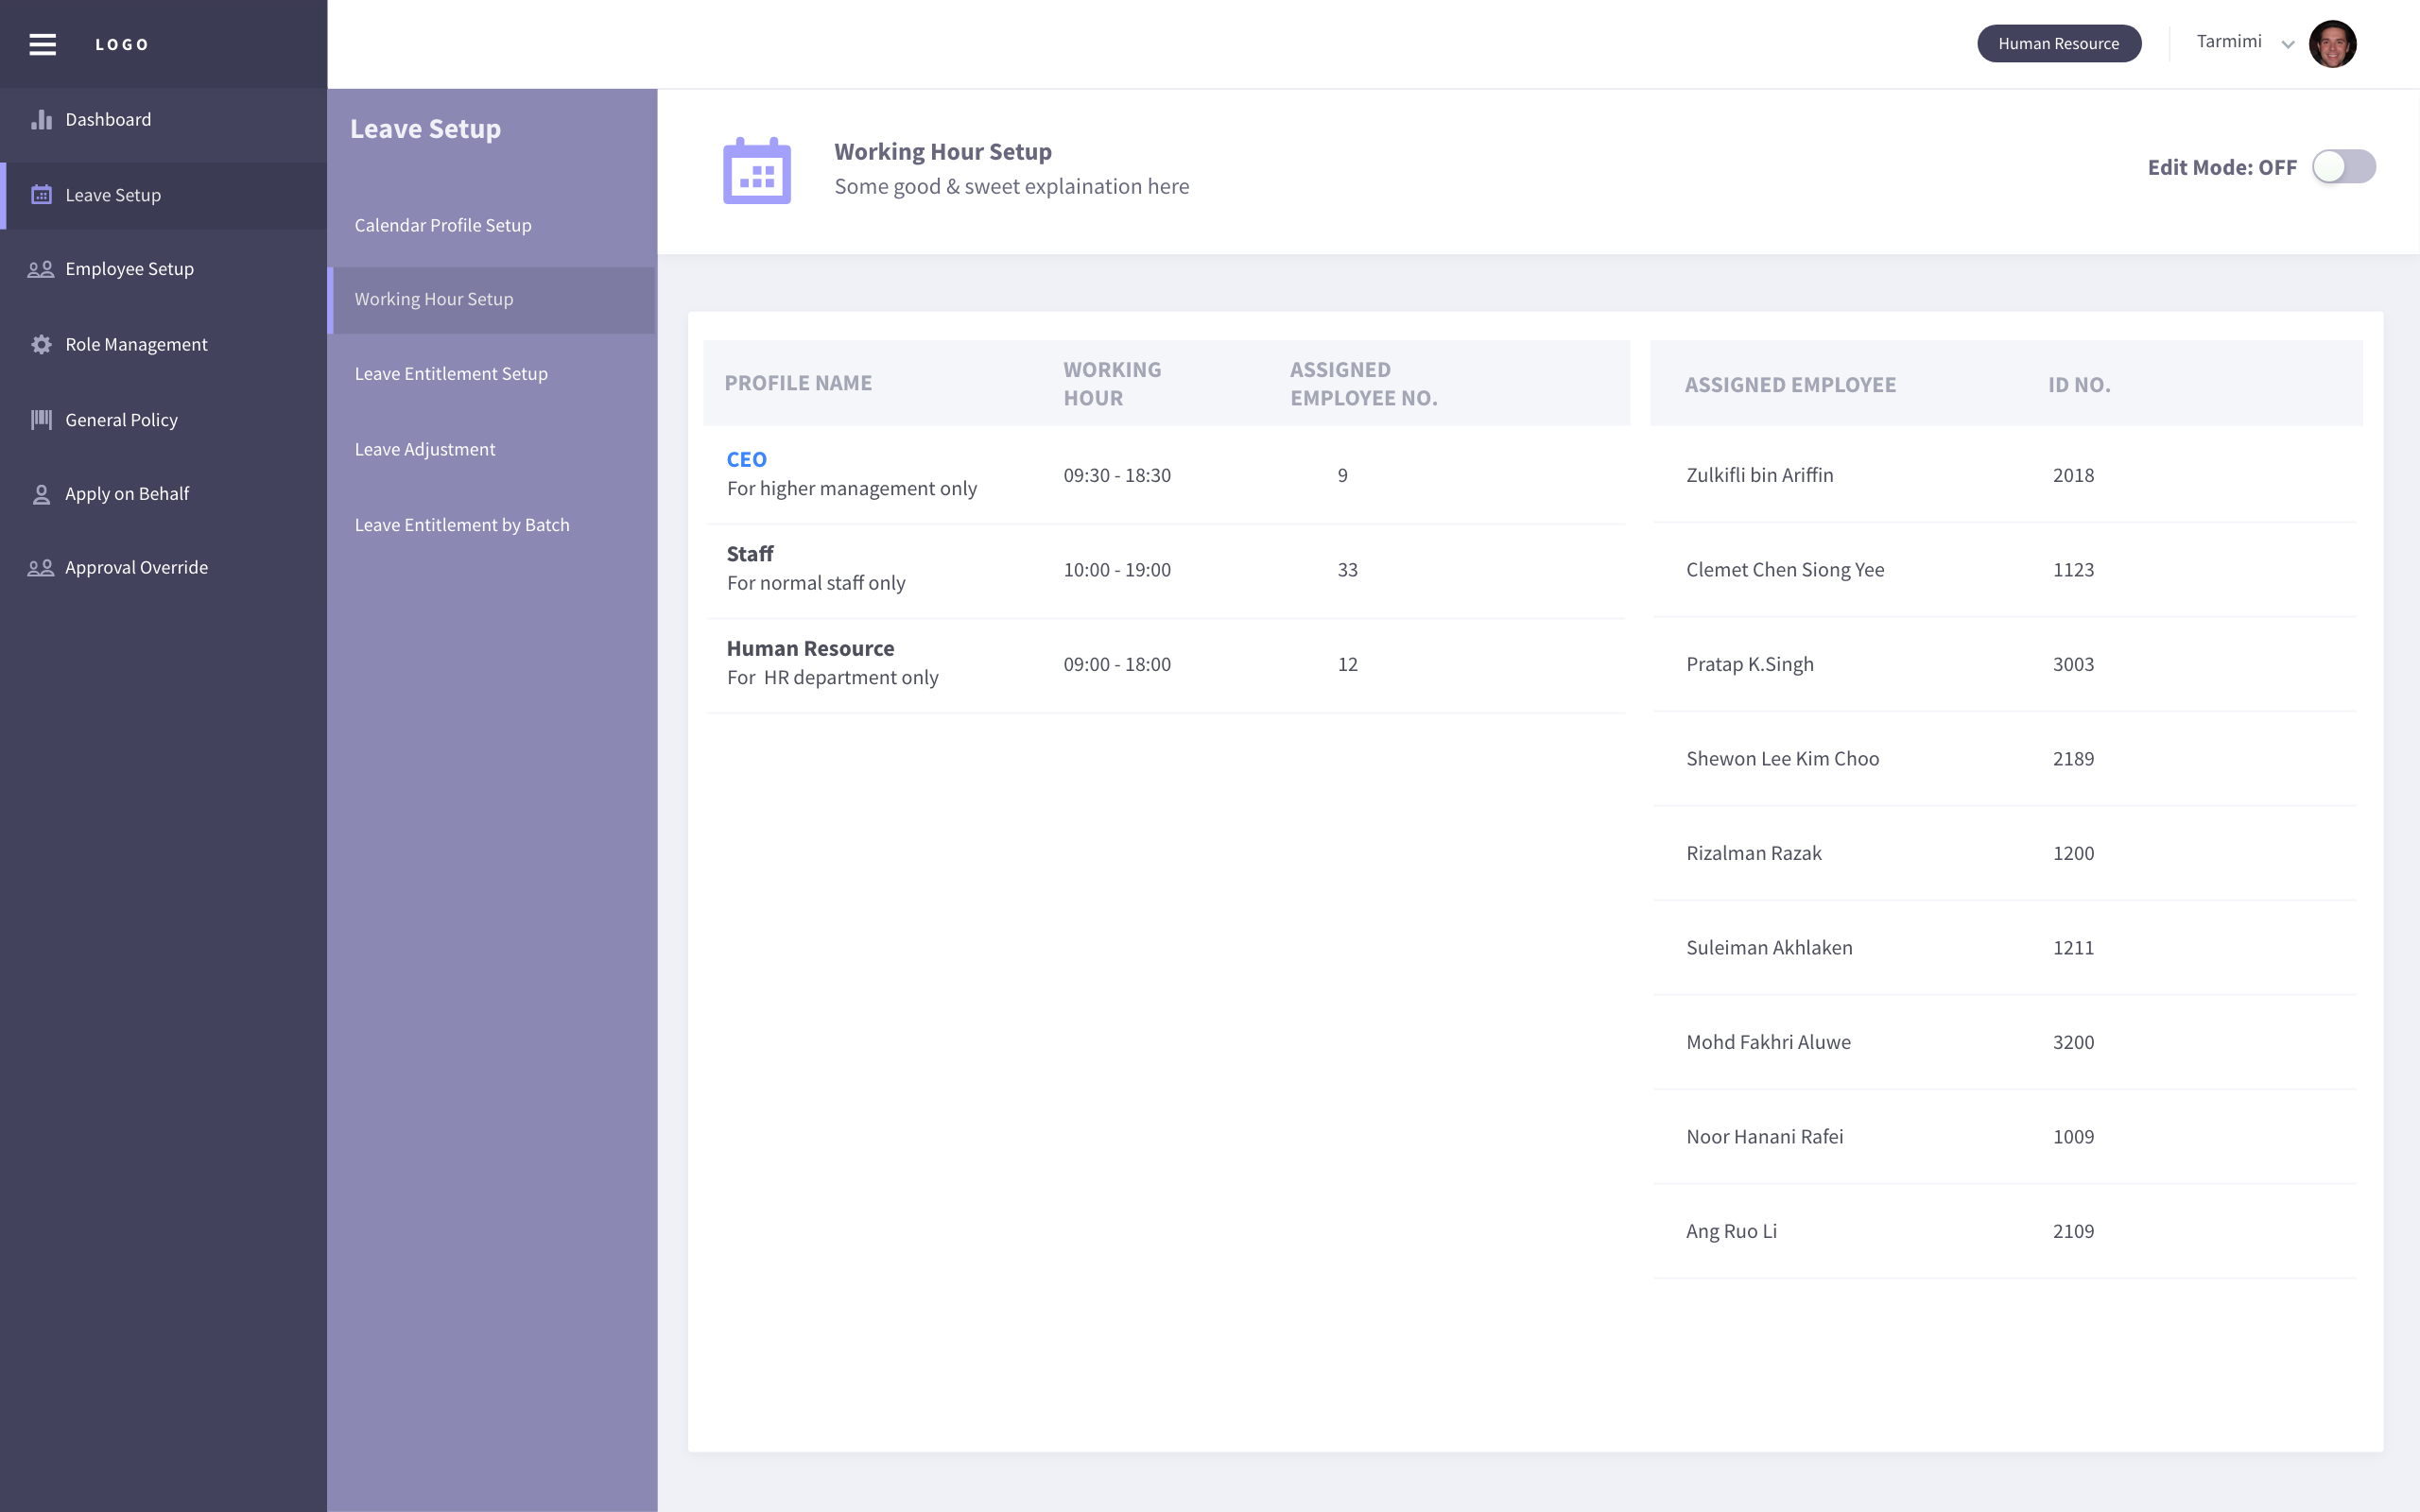
There have few features can be used after toggle Edit Mode to ON as listed here:
Create new working hour profile
Click at the add icon then fill up the mandatory working hour profile name and description. Enter start and end working hour. If the working hour is equal to 8 hours, the half day and quarter day working hour will filled up automatically. Then click on Create button to complete.
- NOTE:
Tick set as default working hour profile will replaced current default working hour profile.
Edit working hour profile name, working hour (full day, half day, quarter day)
Select working hour profile name. Click on the edit icon and modify the field in the slide-in menu. Click on Update button to saved.
Delete working hour profile
Select working hour profile name. Click on the trash icon to delete unwanted working hour profile.
Assign employee to desired profile by using drag & drop individual or bulk
Move one employee
To move only one employee. Drag the employee card and drop it to another working hour profile.
Move multiple employees
Select or tick multiple employee that wanted to move to a same profile. Click on ellipses (three vertical dots) icon and select working hour profile to assign in it.
Set as new default working hour profile
Select working hour profile name. Select unshaded star icon and click Yes to confirm replacement of current working hour profile.
Leave Entitlement Setup
Create & define master list for all type of leave
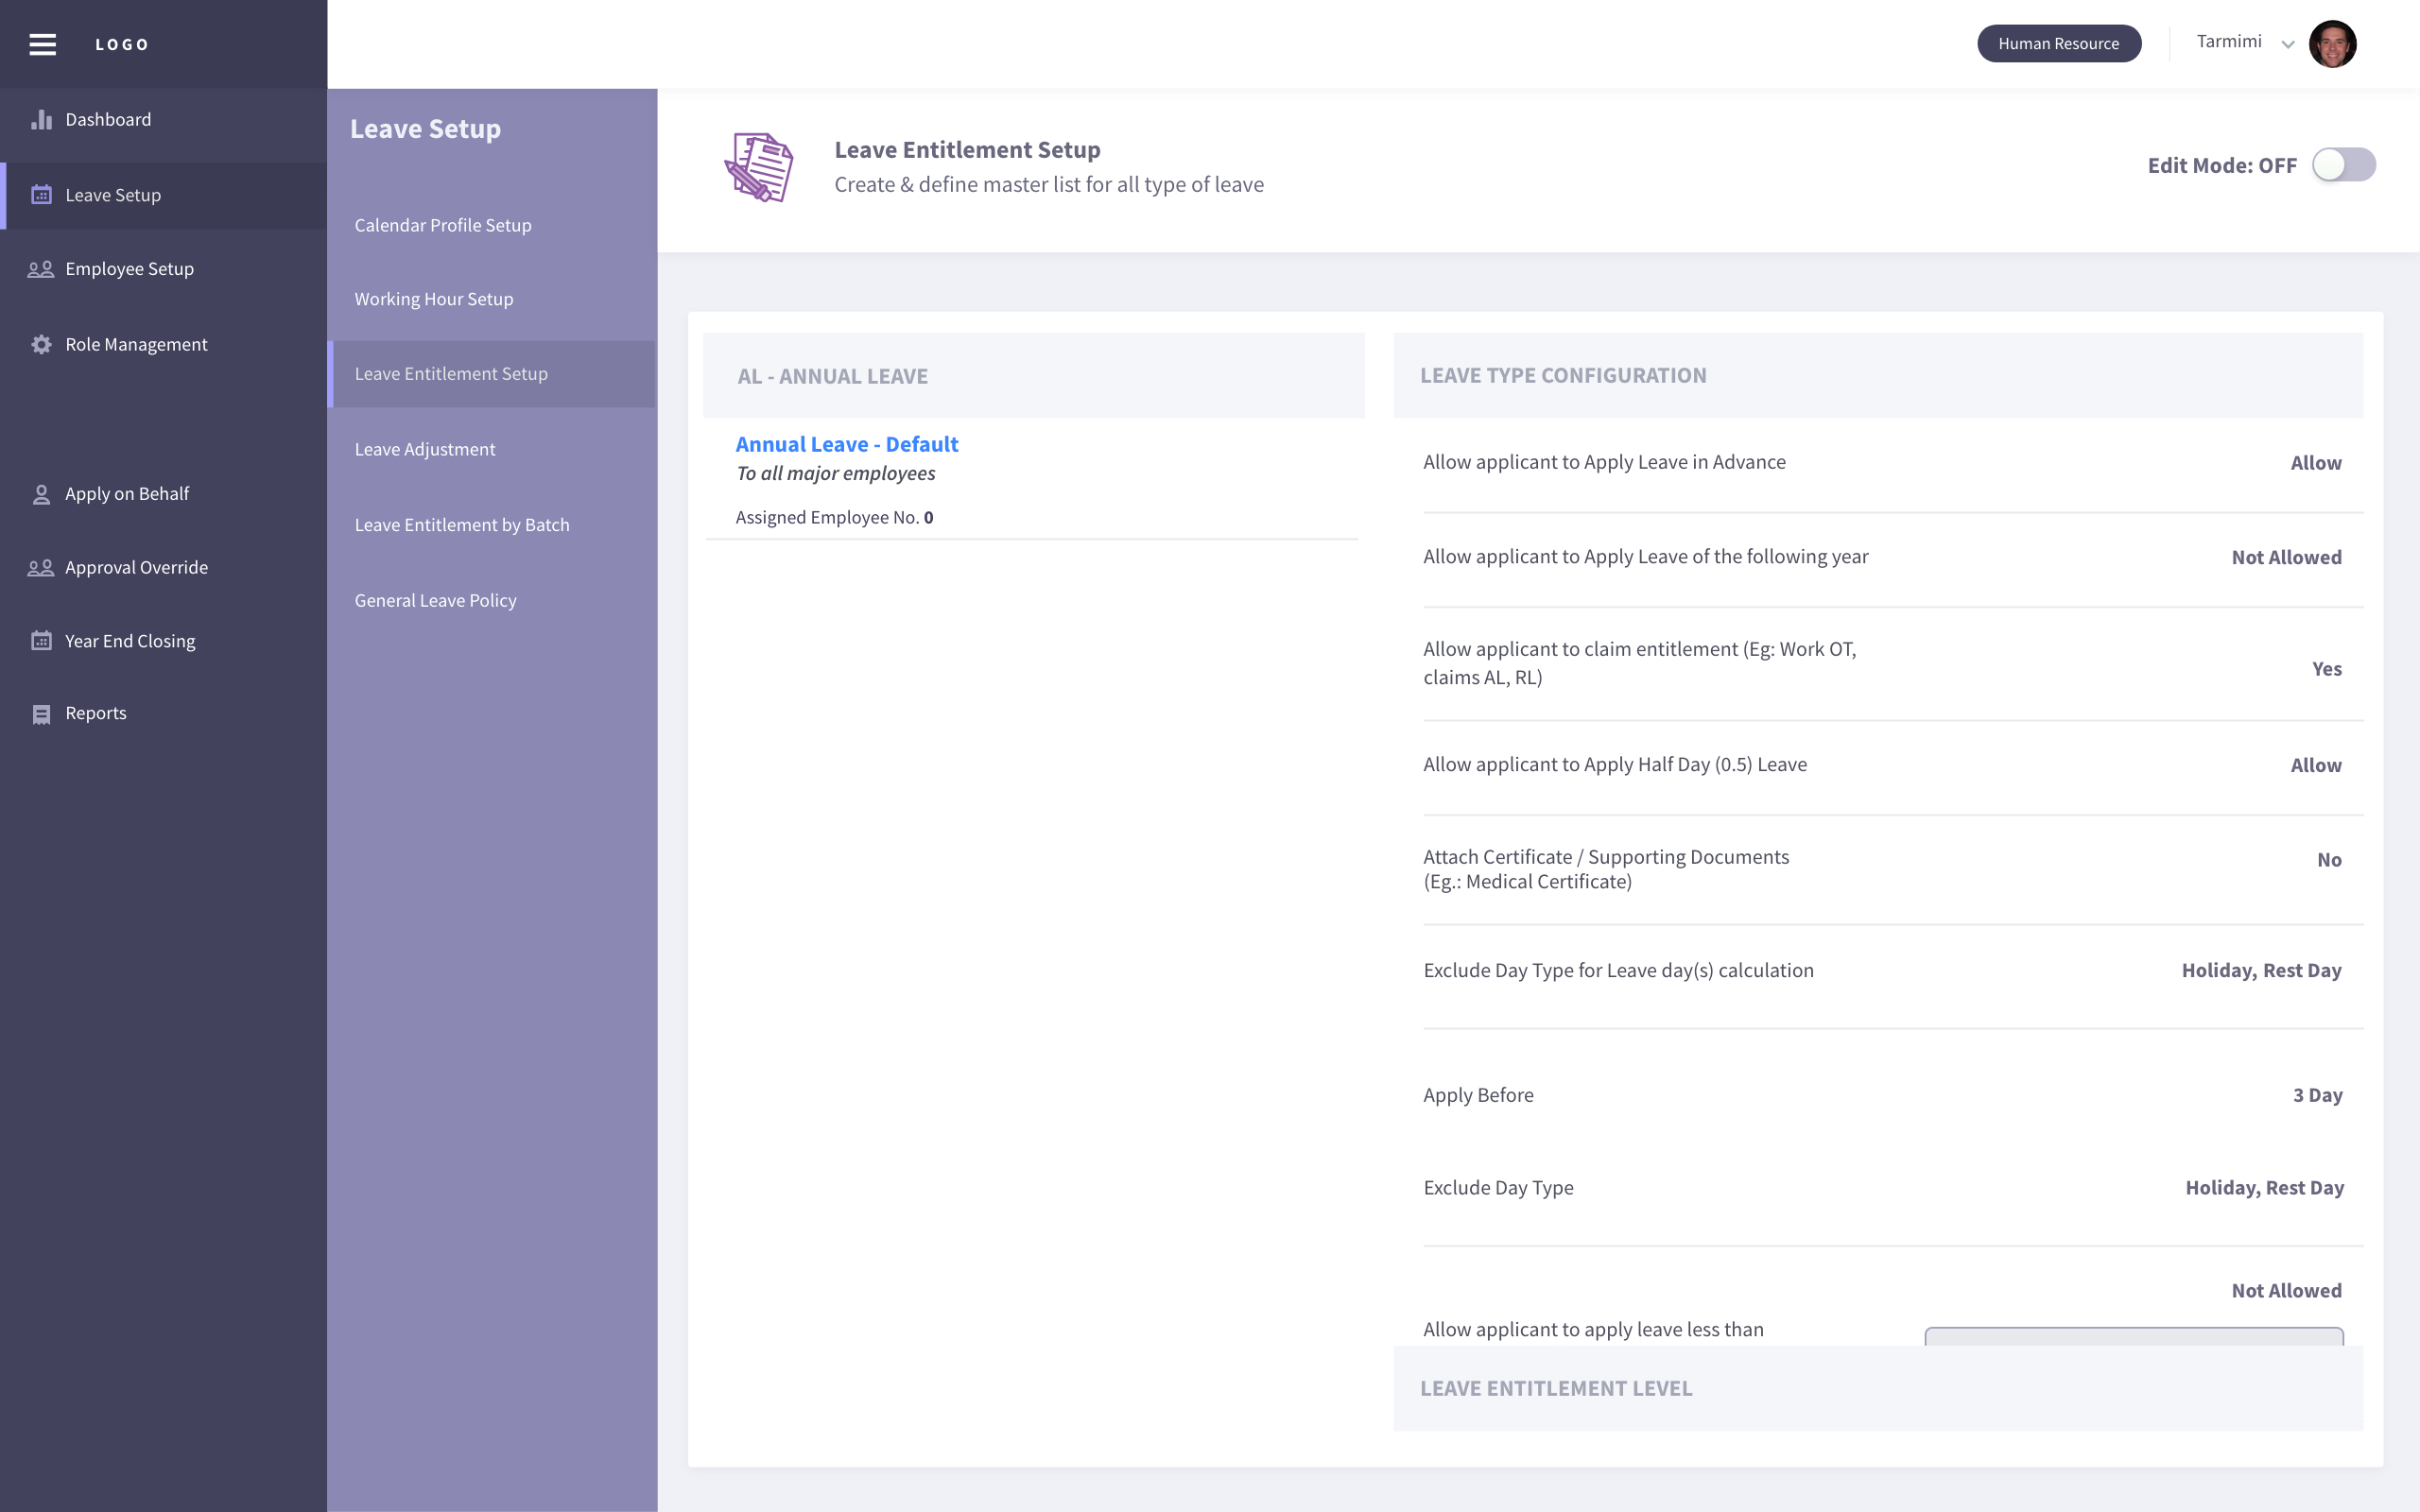
The default leave type & leave entitlement profile will be created after administrator account signed up. Leave entitlement setup started after Edit Mode toggle button was turn ON.
Create New Leave Type & New Leave Entitlement Profile
Click on the Create New button to create new leave type abbreviation & leave type name. Then, click the Create button to proceed for leave entitlement profile creation. Enter profile name & entitlement description and click Add button to complete creation process.
Add/Edit/Delete Leave Type & Entitlement Profile
Click on the pencil icon at the overview page to Edit Data or Clone Existing Data. In Edit Data tab, you’re able to edit leave type abbreviation & leave type name. Leave entitlement profile name & description can be edited and profile can be added or deleted. Click Save button to save all edited data.
Leave Type Configuration
Select the desired entitlement profile and configure the setting in the Leave Type Configuration tab.
Leave Entitlement level
Default level 1 is created automatically. You’re able to edit the service year data, entitled day & bring forward value. You can create new level for senior and delete unwanted level data.
- NOTE:
At least one leave entitlement level must be saved
Toggle Off Edit Mode
Lastly, toggle off the Edit Mode button at the top-right corner to save all the leave type configuration & leave entitlement level data.
Leave Adjustment
A section to edit and adjust the leave entitlement number of days for selected employee
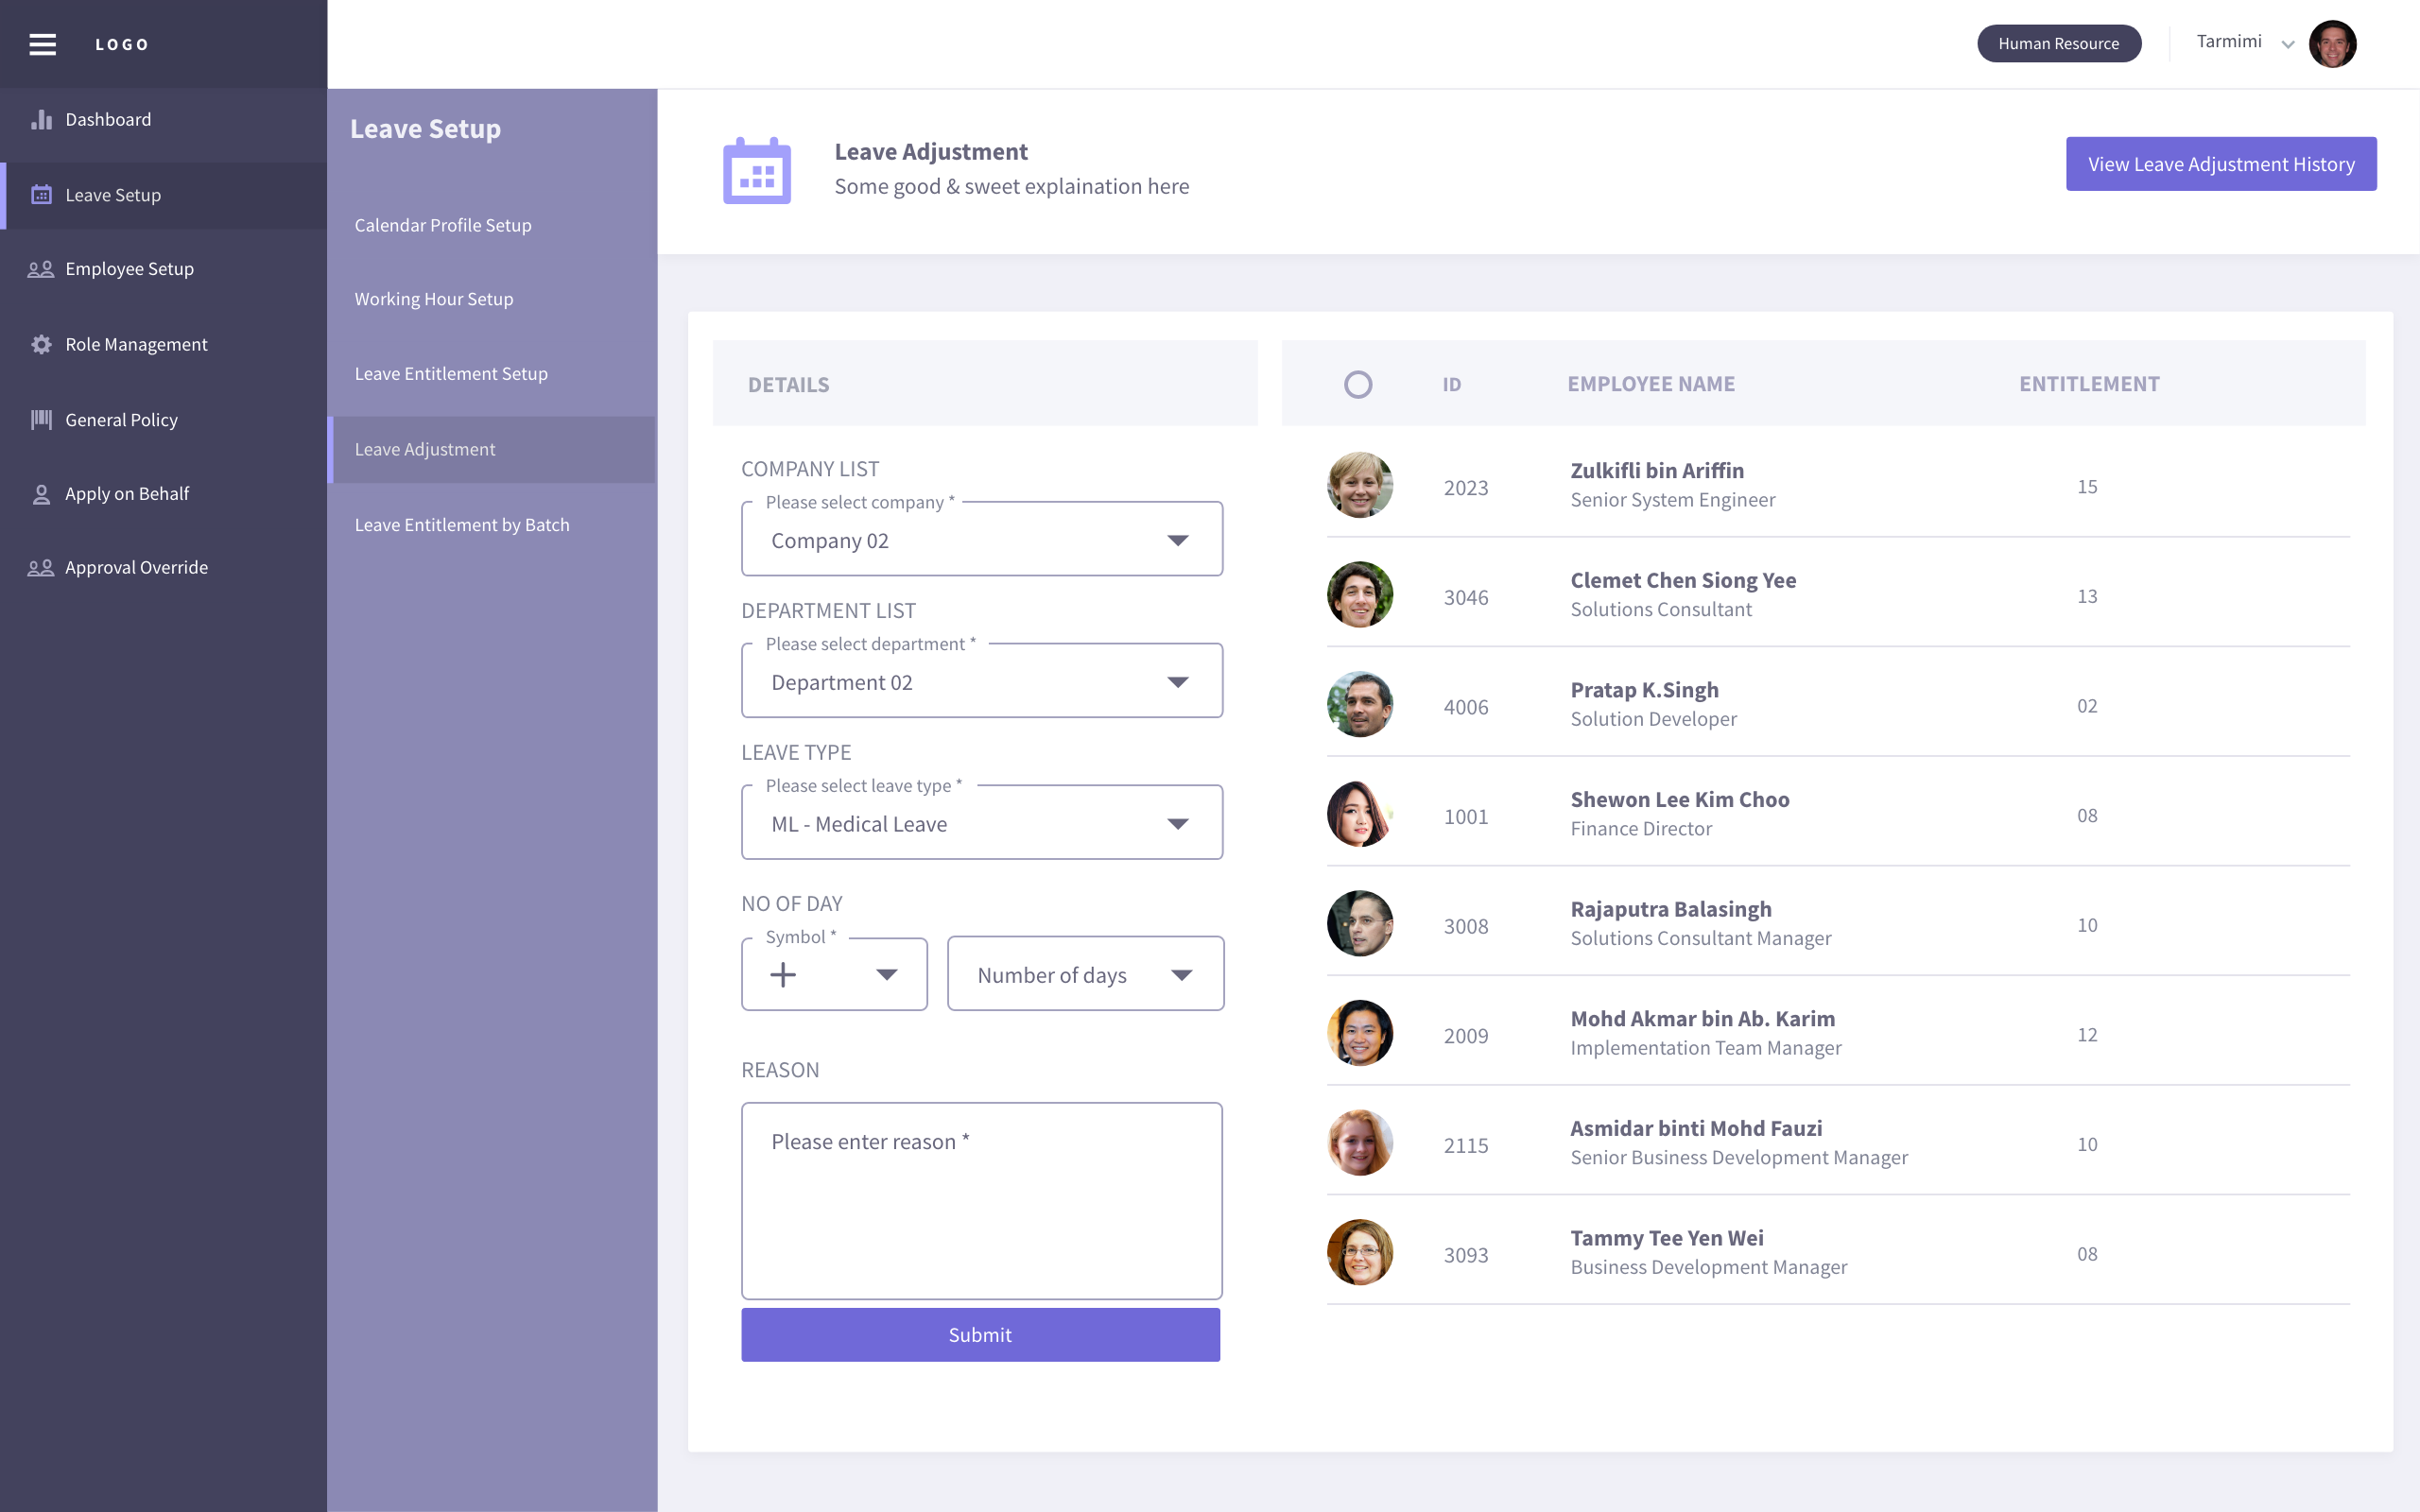
In Details tab, select desired company and department to check the employee list in right hand side tab. Continue select the desired leave type to see employee entitlement number of days. Select plus(+) or minus(-) symbol and key in number of days to adjust. Lastly, enter reason for this adjustment and remember to tick on the employee before click Submit button to complete.
You can check the leave adjustment history by clicking on the button at the top-right corner.
Leave Entitlement By Batch
A section to assign leave entitlement to selected employees
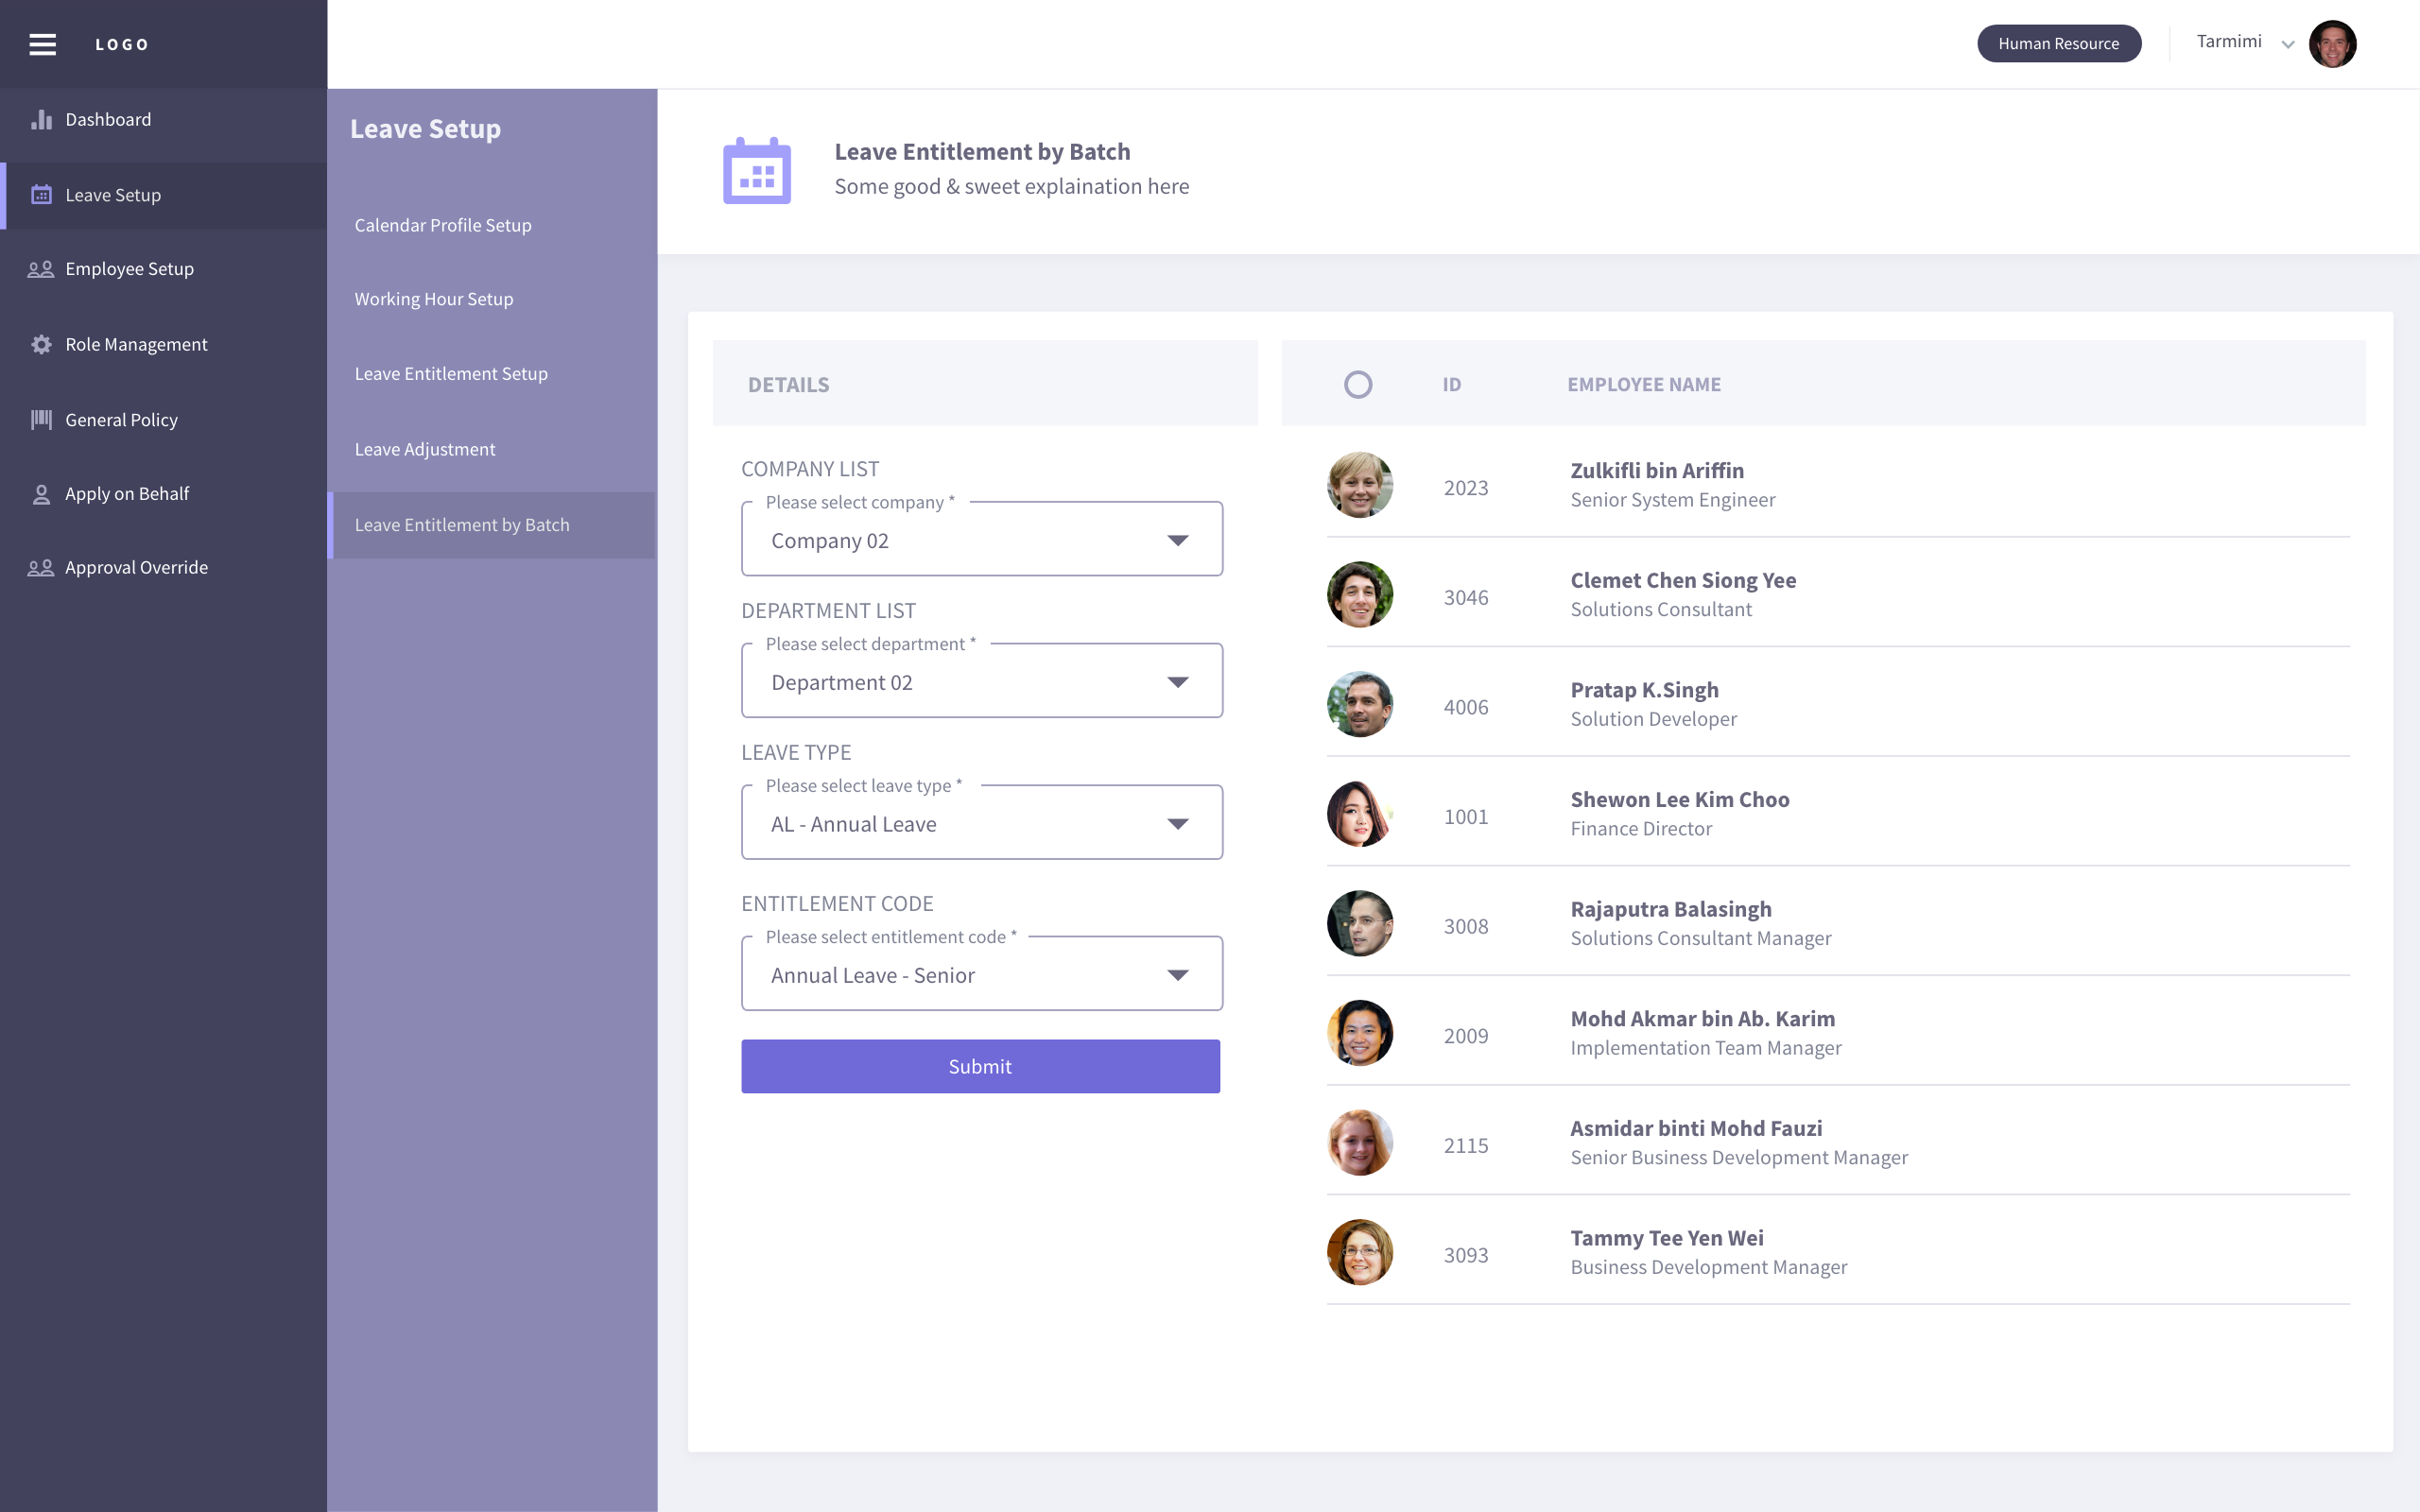
In Details tab, select desired company and department list to see employee list in right hand side tab. Select leave type and entitlement code/profile filtered by selected leave type. Tick the employees to be assigned under this leave entitlement. Click on Submit button to complete.
General Leave Policy
Manage tenant leave policy to ensure general information is created in application
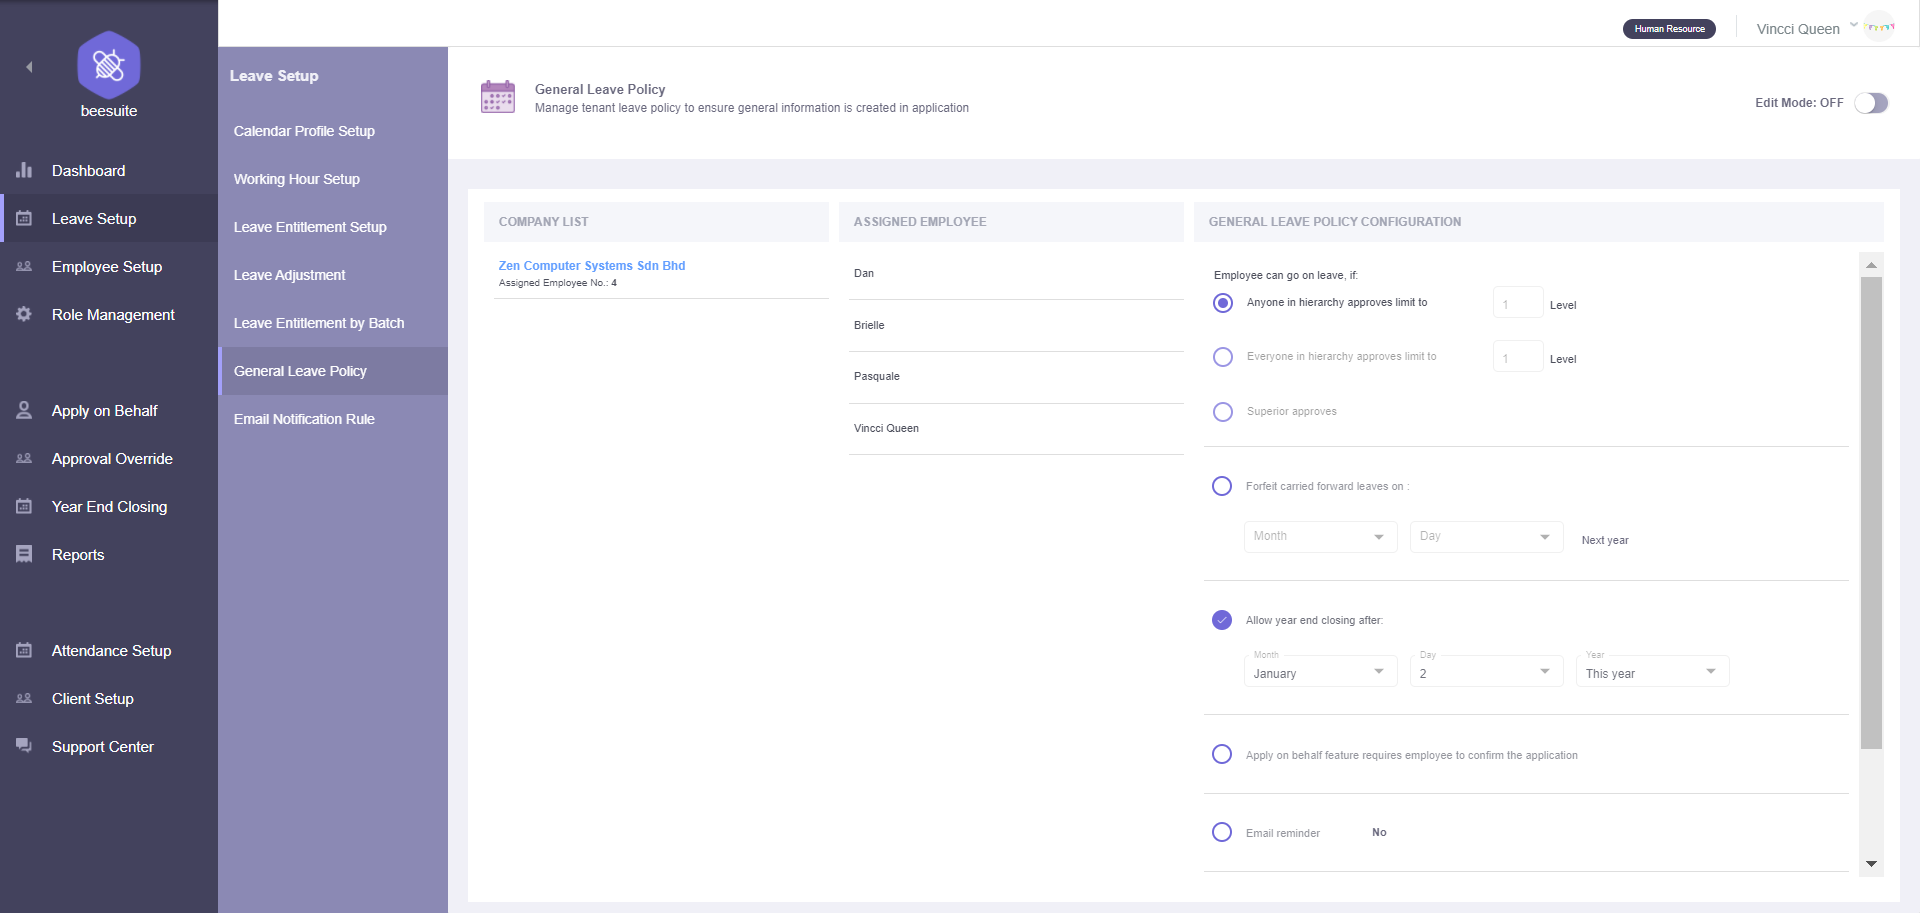
View assigned employee list and general leave policy configuration by clicking on the company name. To enable edit mode, toggle the Edit Mode button at the top-right corner to ON. The setup features including:
Create New Company
Click on the add icon at the Company List tab. Fill in the new company name in the slide-in menu and click on Create button to complete creation.
Edit Company Name
Click on the edit icon to modify company name in the slide-in menu. Complete process by clicking on Update button while cancel changes by clicking outside of the slide-in menu.
Delete Company Name with Its General Leave Policy Configuration
Click on the trash icon to delete the unwanted company and its policy.
- NOTE:
Please re-assign all the employees under that (to be delete) company before delete. To re-assign employee please go to Employee Setup page.
Edit General Leave Policy Configuration
Simply change the general leave policy configuration of the selected company when the Edit Mode is ON. Toggle OFF Edit Mode to save the changes of the configuration.
Email Notification Rule
Manage selected employee or external email to get email notification when related employee is on leave
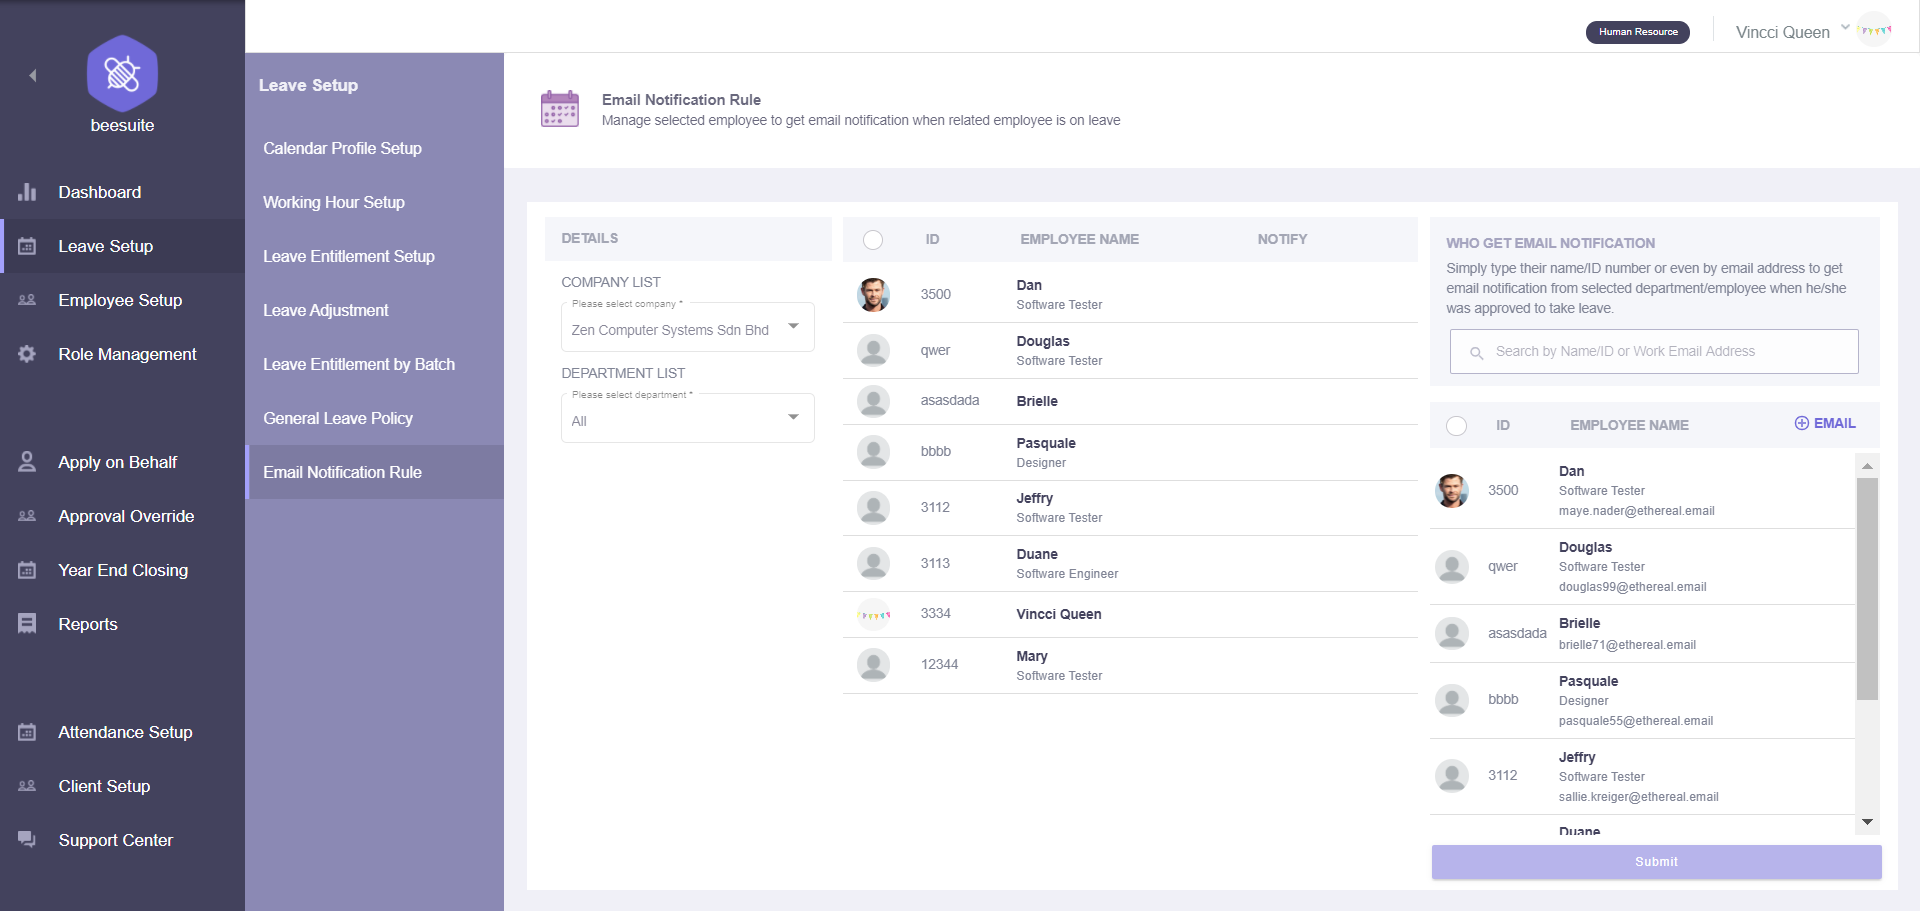
View who’s email is notify when employee is on leave. To edit notify list, simply select the employee by filter from the company and department. Tick on the employee and click add icon to add external email (in slide-in menu) which able to receive email when he’s on leave. Tick on the new email added or existing employee at the last column, then Submit to save the setting.
Employee Setup
Create and manage user profile details for all company
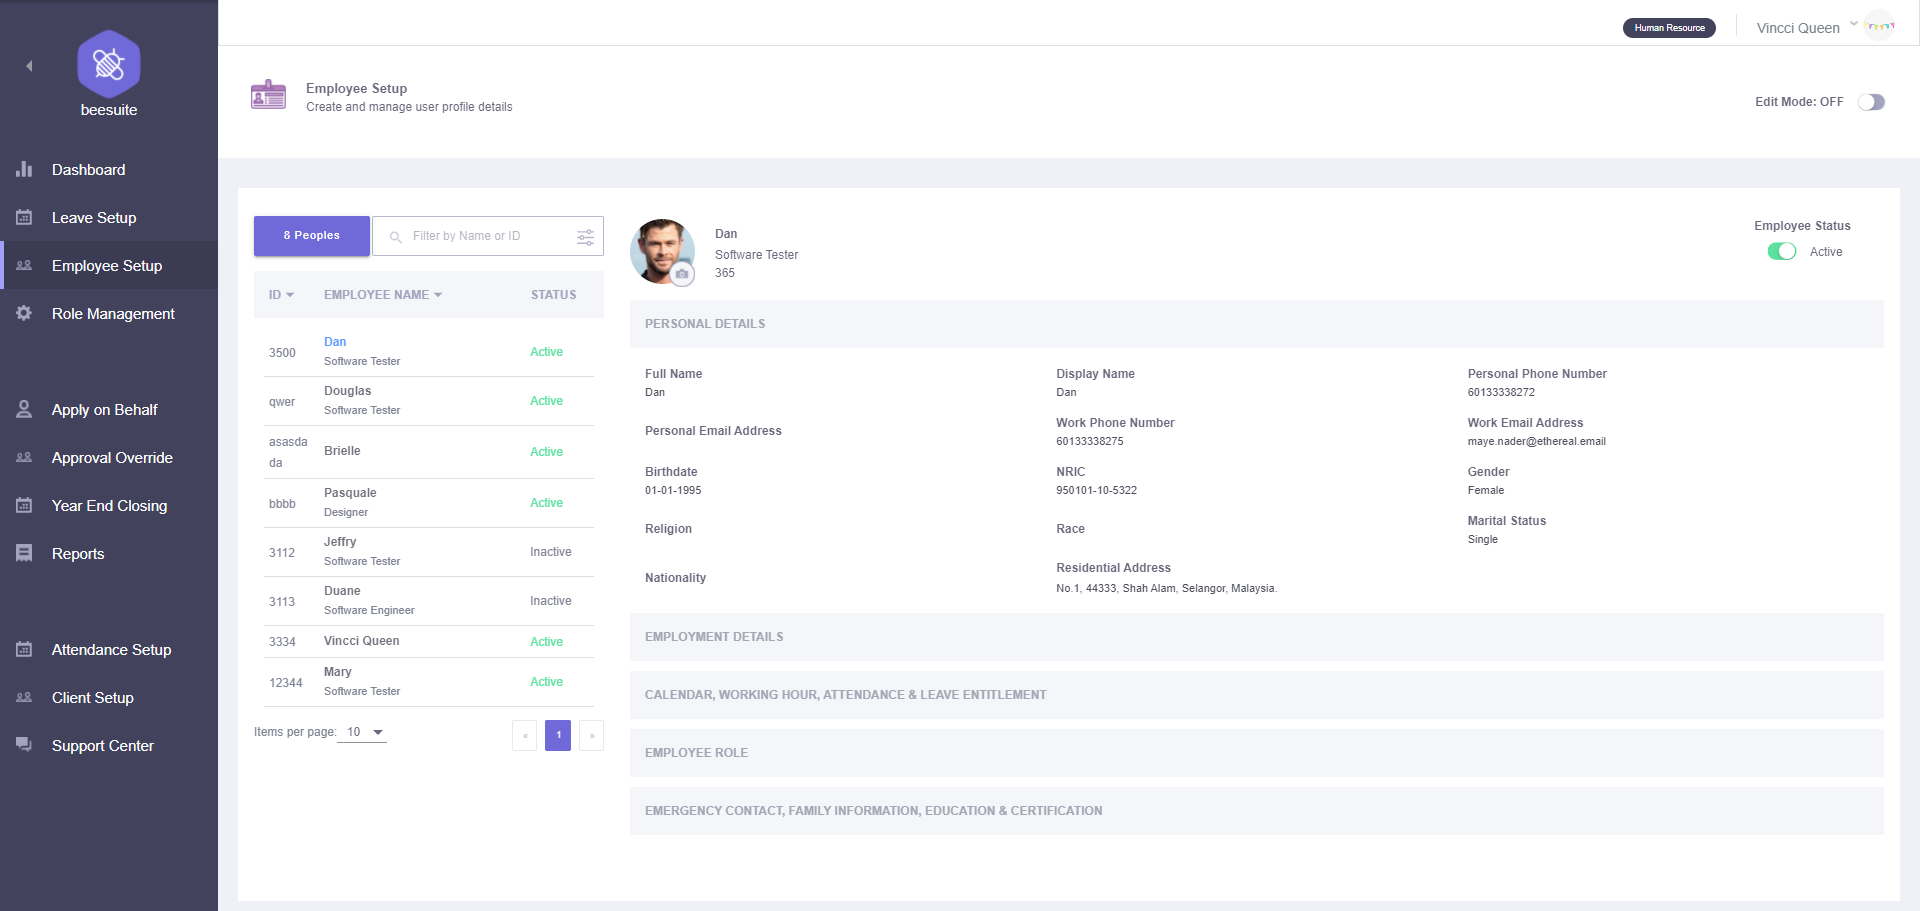
View basic information of all employee at the left-side table list. Check each employee personal details, employment details, calendar, working hour, leave entitlement, employee role & emergency contact, family information and education certification at right-side column. Find specific employee through the searchbar and filter function. Administrator able to change user profile picture by clicking on the camera icon. Change employee status from Active to Inactive or vice versa at the toggle button under Employee Status toggle button. There have few features when the Edit Mode is toggle ON:
Add New Employee
Click on the add icon at the employee list table. From the slide-in menu, there have two methods to add new employee:
By Individual
Fill up all the mandatory field which is company, new employee name, email, employee ID and hired date. Then, click Add button to save this new employee basic information.
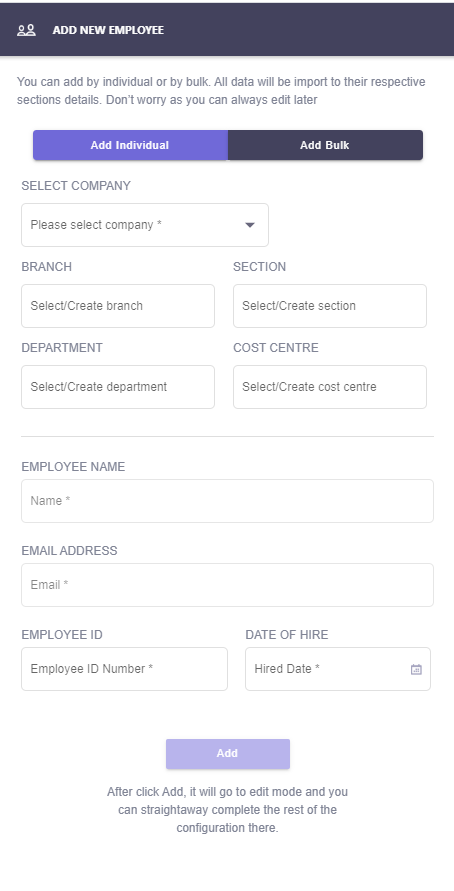
By Bulk
Download the csv template by clicking on the below ‘here’ link. Fill up all the employees details and save the csv template. The template column consists of:
STAFF_EMAIL*
STAFF_ID*
FULLNAME*
NICKNAME
NRIC
DOB
GENDER
MOBILE_NUMBER
WORK_NUMBER
MARITAL_STATUS
ADDRESS
POSTCODE
CITY
STATE
COUNTRY
MANAGER_EMAIL*
DESIGNATION
DEPARTMENT
COST_CENTRE
BRANCH
DIVISION
SECTION
COMPANY*
JOIN_DATE*
CONFIRMATION_DATE
RESIGNATION_DATE
Click on the Choose File button to add the saved file or open folder and drag saved csv file to the dropzone. Then, click on the Upload File button to complete the bulk import process.

- NOTE:
STAFF_EMAIL*, STAFF_ID*, FULLNAME*, MANAGER_EMAIL*, COMPANY* and JOIN_DATE* in CSV template is mandatory to fill up before upload. Please make sure the uppercase and lowercase of the company name is correct. All date format is required in dd-mm-yyyy.
Edit Personal Details
Employee full name, personal & work email address and NRIC is mandatory to fill up before save. Others personal details is allow to leave empty and let employee to fill up by their own.
- NOTE:
Birthdate, NRIC, gender, nationality and race is not allowed to edit by employee. Only administrator have the rights to edit them.
Edit Employment Details
Company selection and reporting is mandatory to fill up before save. Employee only allow to edit their own bank account name, account number, EPF number and income tax number. Others employment details information needed to be completed by administrator.
Assign Calendar, Working Hour & Leave Entitlement
Calendar profile, working hour profile & leave entitlement is mandatory to assign by administrator before save.
Assign Employee Role
Employee role is compulsory to assign before save.
Edit Emergency Contact, Family Information, Education & Certification
All the field here is optional for administrator. Employee have the rights to edit all the field here in their profile. But personal details mandatory field must be completed before save the details here.
Delete employee permanently
Click on the trash icon at the unwanted employee in the table and press confirm delete at the pop-up. That employee will be permanently removed from the list and the employee data will be erased from database.
- NOTE:
To temporarily disable the employee from login to the profile. Simply toggle the employee status to Inactive and the data will be kept in the database.
Role Management
Create the user role and the configuration based on their access level
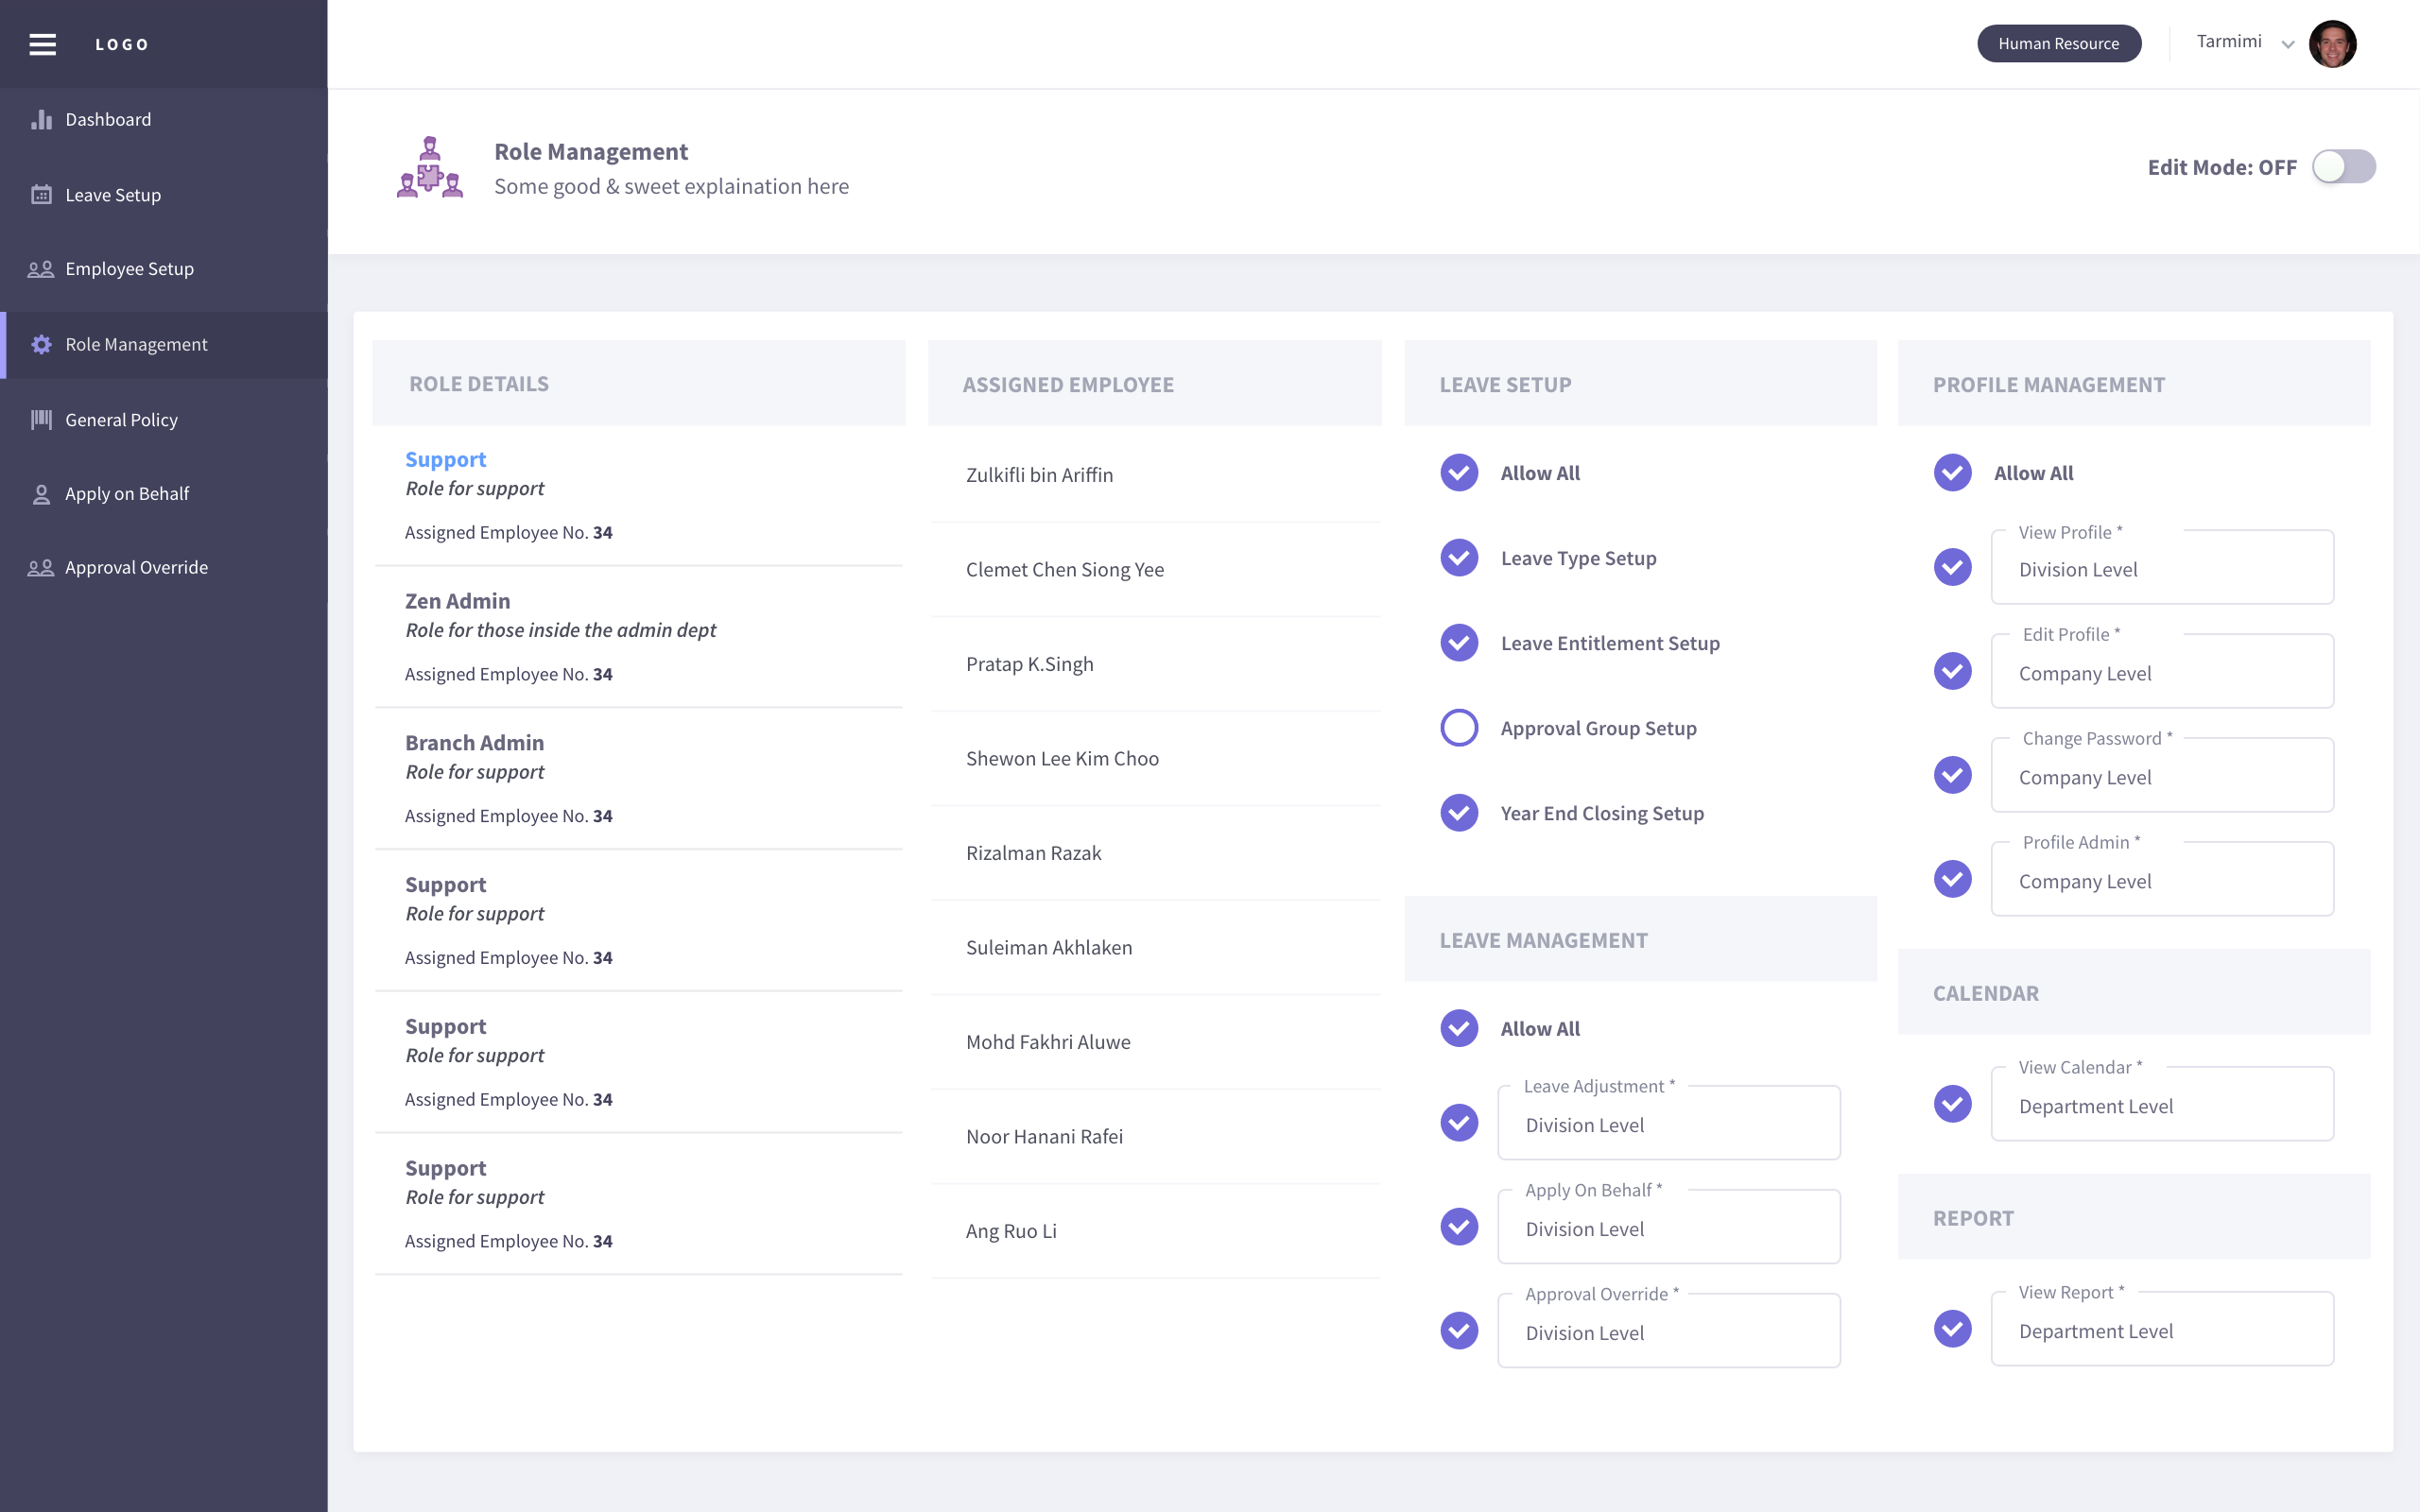
View the roles list and its access level that assigned to the employee. There have few features of role management setup when the Edit Mode toggle button is turned ON.
Create New Role/Clone Existing Role Data
Click on the add icon at the Role Details tab. Choose Create New or Clone Existing Data tab to continue.
Create New - Fill in the role name and description for the new role. Tick set as default profile will replace original default profile. Then, click Create button to complete creation.
Clone Existing Data - Tick a role profile that you wish to clone then click on Create button to copy this role profile data. Newly clone role will appear in Role Details list with a (copy) behind the original role name.
Edit Role
Click on the edit icon in Role Details list. From slide-in menu, edit the role name or description and click Update button.
Delete Role
Click on the trash icon to delete role from the list.
- NOTE:
Please re-assign all the employees under that (to be delete) role before delete. Refer item no.5 below to check on how to re-assign employee.
Set as New Default Profile
Shaded star icon is the current default profile. You may change it by clicking on other non-shaded star icon and click Yes button in the confirmation pop-up to replace original role.
Re-assign Employee to another Role Profile
Select a role profile with assigned employee. To move only one employee, drag at the nine-dots icon of employee name box and drop into the role profile box you wish to move; To move multiple of employees, tick on the employees and click on ellipses(three-dots) icon then select the role profile you wish to move.
Edit Leave Setup, Leave Management, Profile Management, Calendar & Report Access Level
Edit the access level for all field of setup by tick or untick and choose selection level for the ticked checkbox. Toggle OFF Edit Mode to save all the access level changes.
Apply On Behalf
A section for administrator to apply on behalf for any type of leave for employee
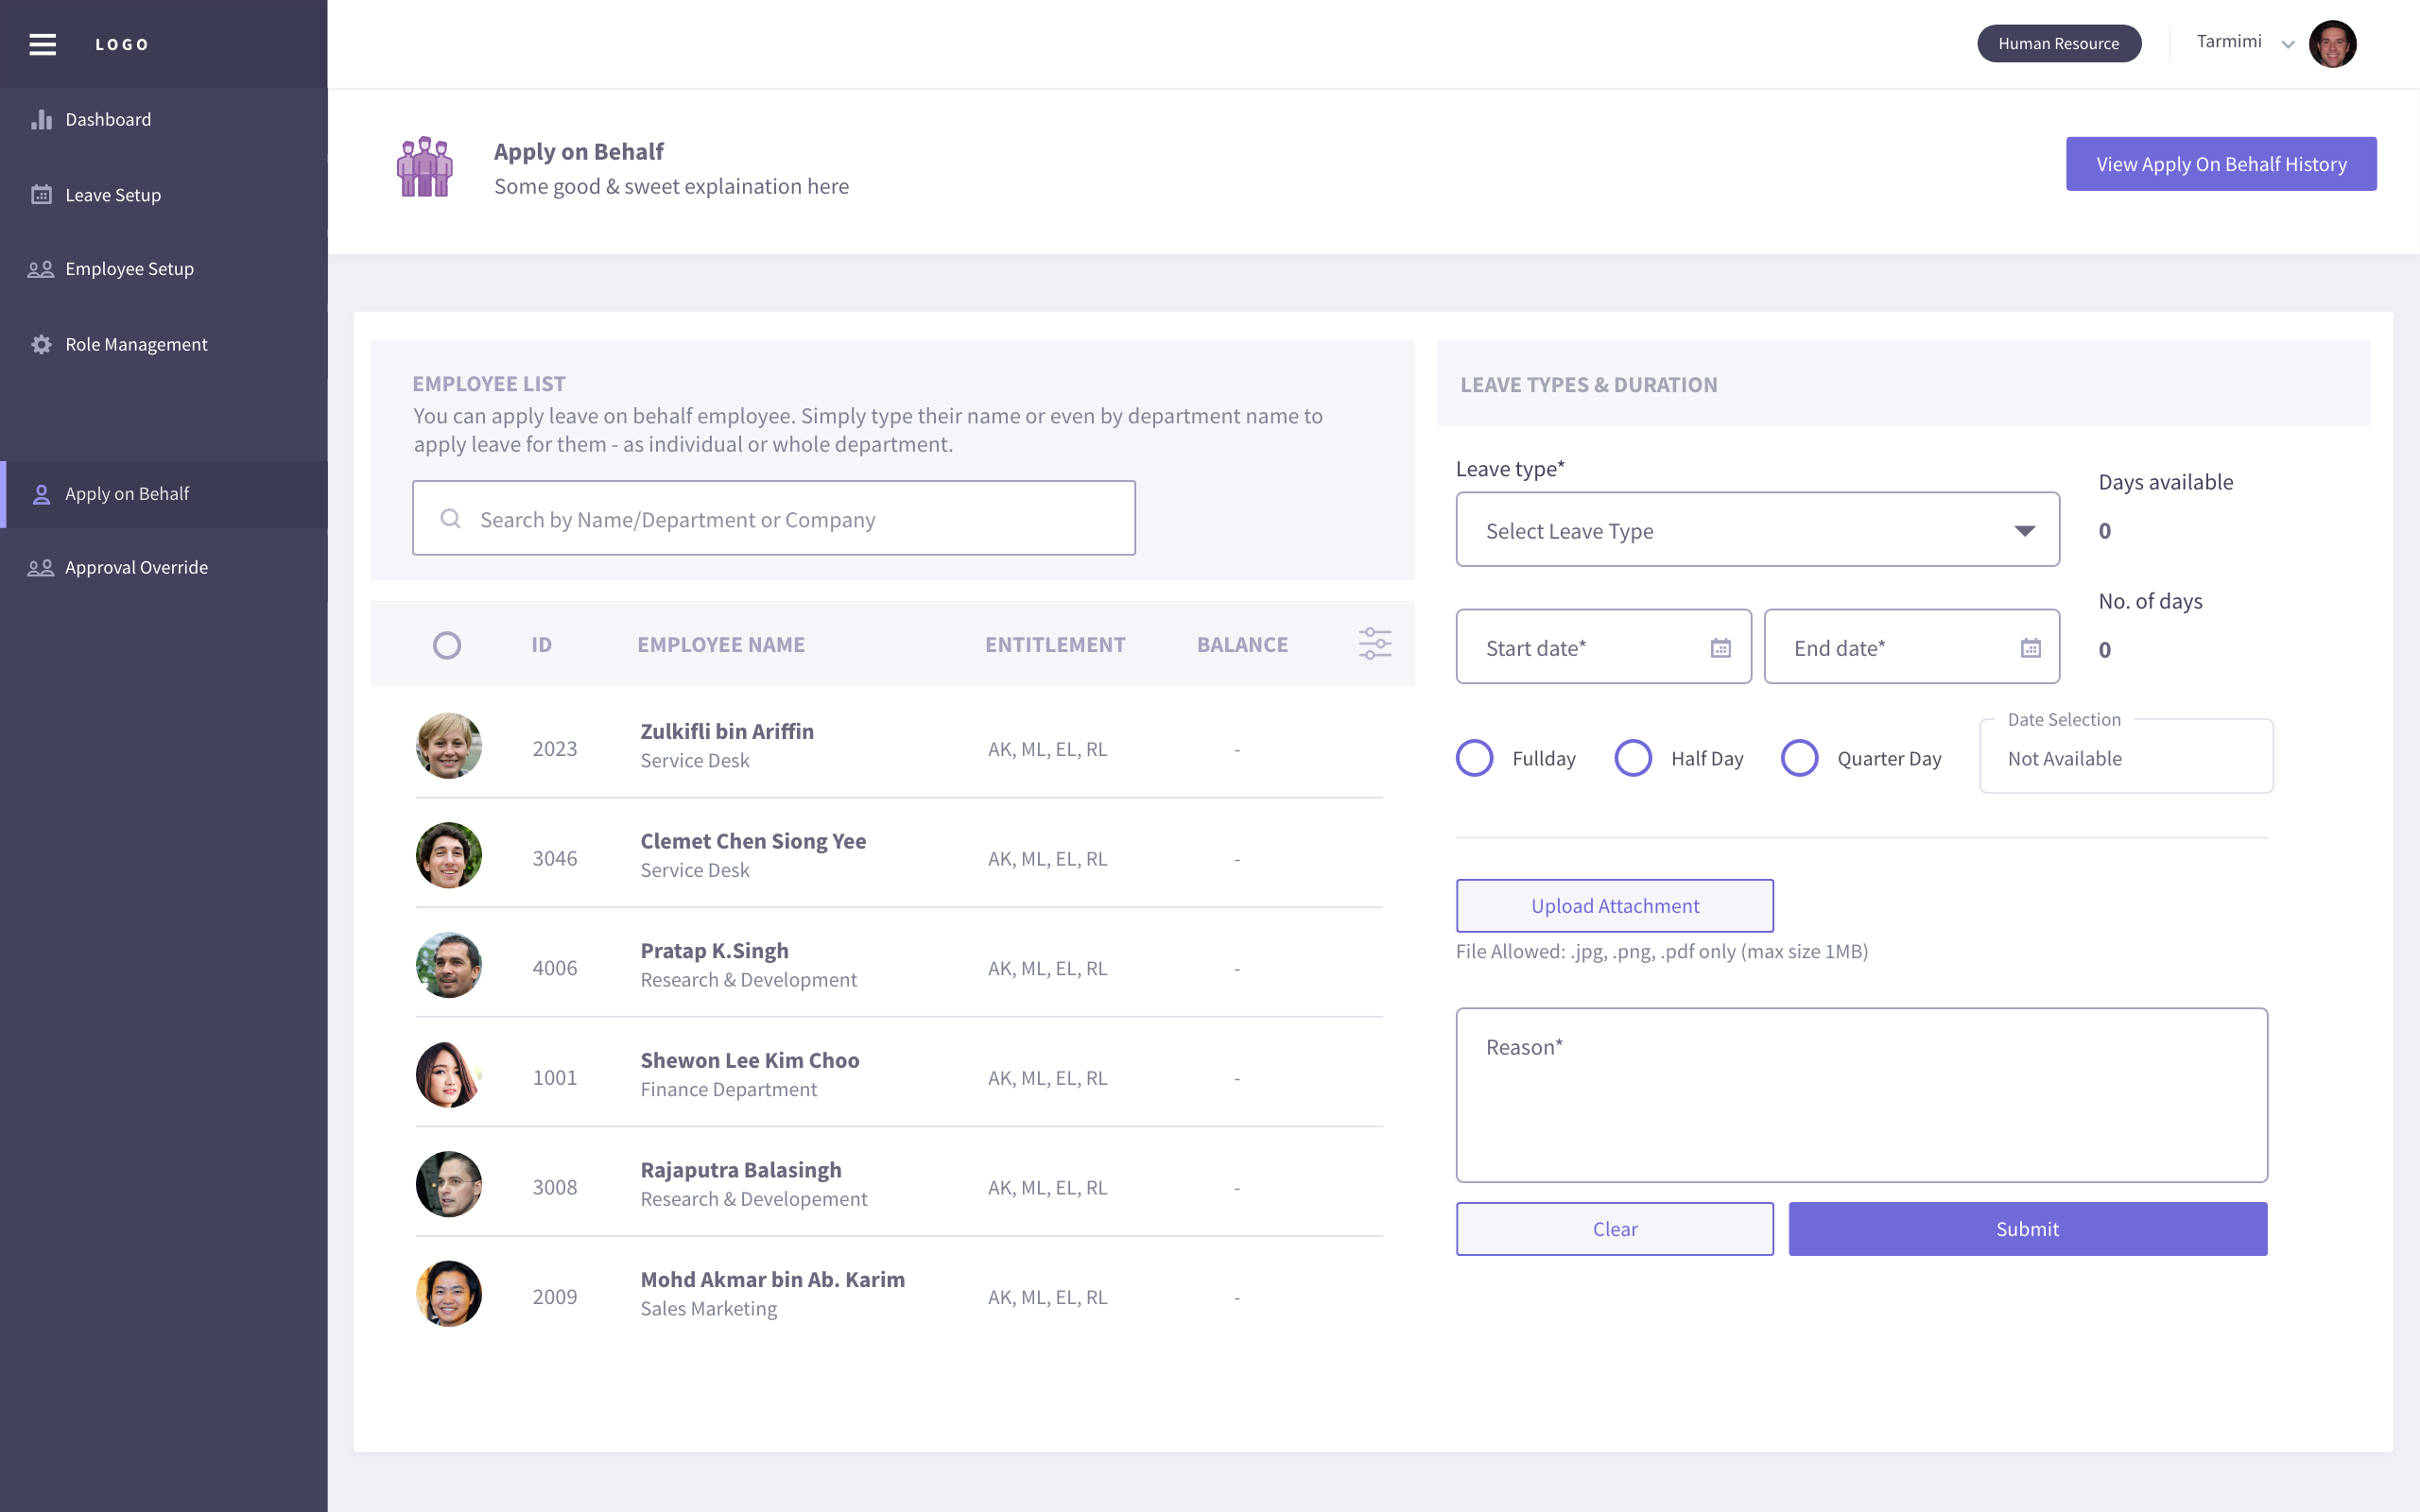
View employee list and their entitlement at the left-side column. Filter employee name/department or company from the searchbar to find employee. Tick one or multiple employee to configure leave types & duration at the right-side column. The configuration for leave types & duration column consists of:
Select leave type and number of days available is displayed (is hidden when more than one employee is selected)
Choose the start date and end date. Then, configure day selection (Full Day, Half Day, Quarter Day) of each date
Upload attachment (eg: medical leave certificate) is optional
Enter the reason for apply on behalf
Click on the Submit button to complete the application
Check the history application by clicking on the View Apply On Behalf History button at the top-right corner.
Approval Override
Override leave application status for employee
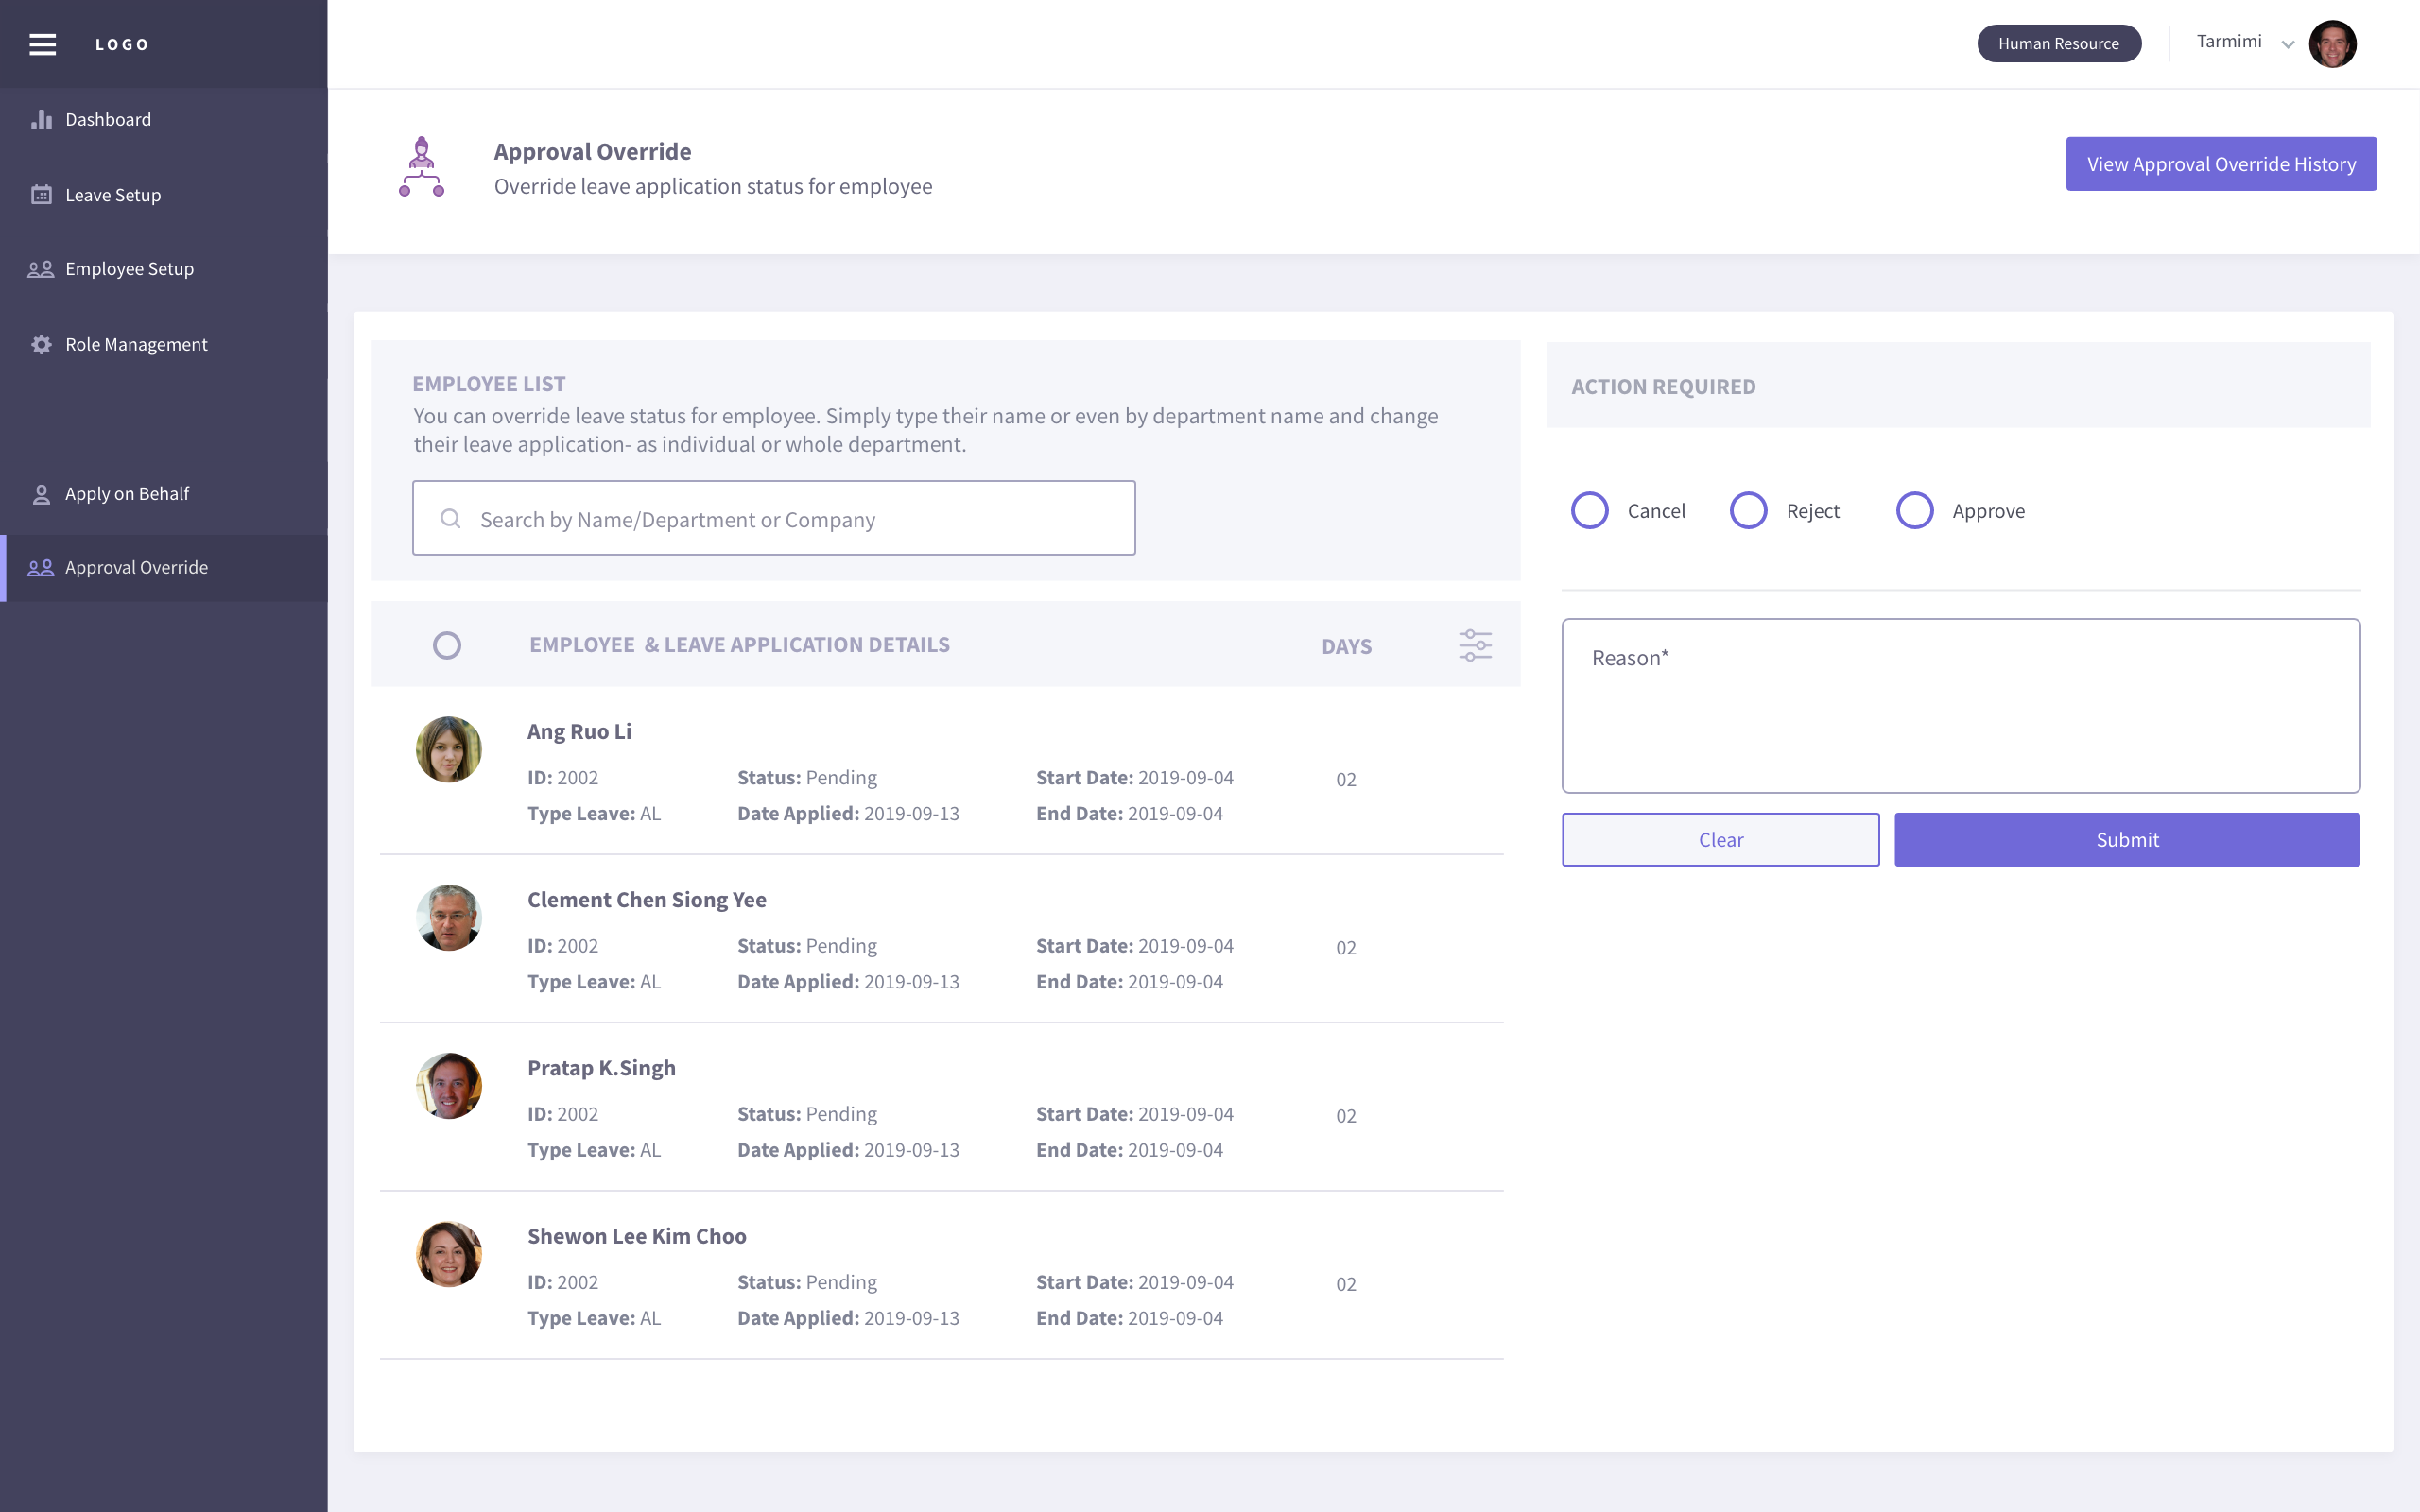
View the employee leave application details at the left-side column. Filter the employee name/department or company to get employee you wish to find.
Tick Cancel/Reject/Approve checkbox for the approval action
Enter reason for the approval
Click on the Submit button to complete approval
Year End Closing
Year End Closing is a setup to clear the leave in a current year to close account for all employee
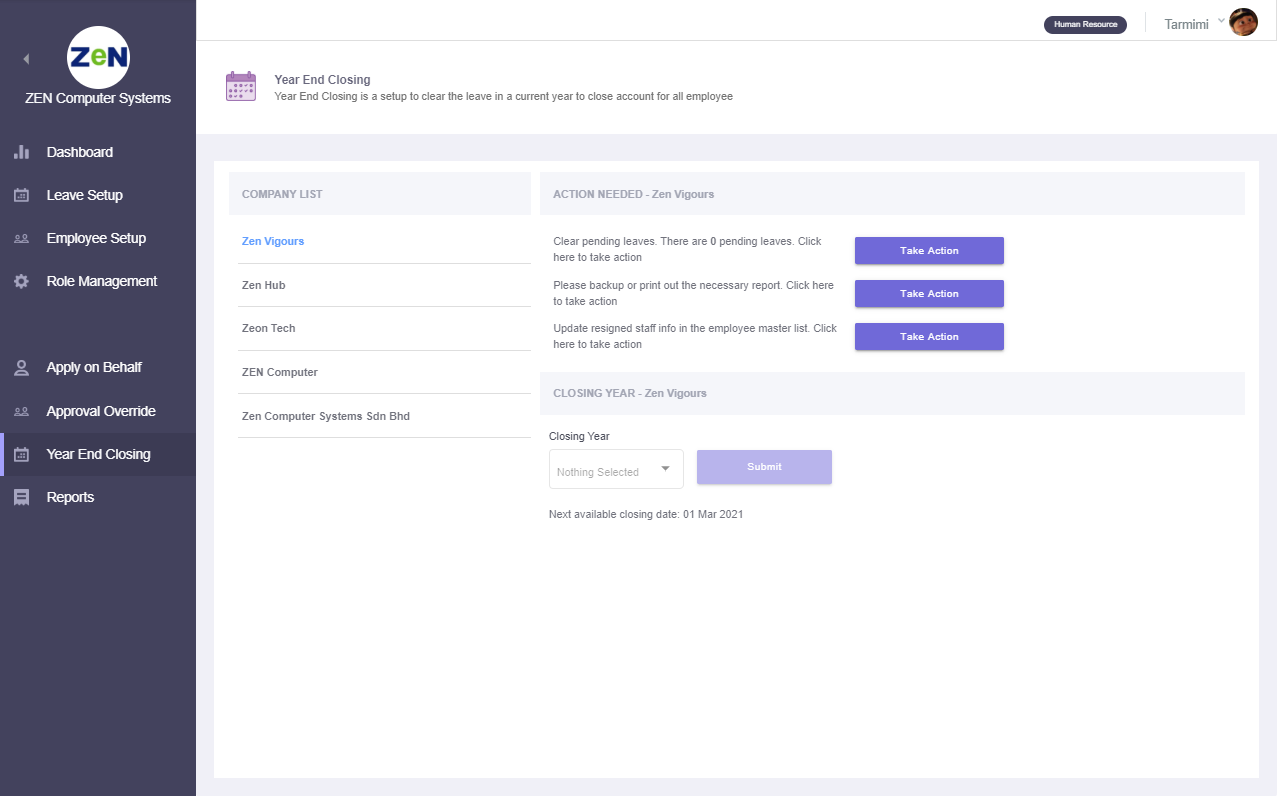
View company list and check its action needed before closing. The action needed are:
Clear the pending leave
Backup or print the necessary report for documentation
Update or manage resigned employee
Click on the required Take Action button to route to the Approval Override page, Reports page or Employee Setup page.
Lastly, default closing year is selected automatically. Click on the Submit button to complete year end closing process.
- NOTE:
If no default closing year is selected, administrator need to wait until the next available closing date as shown below the closing year selection is reached.
Reports
Produce reports for individual and group. Simply select report & leave types, then proceed with select employee
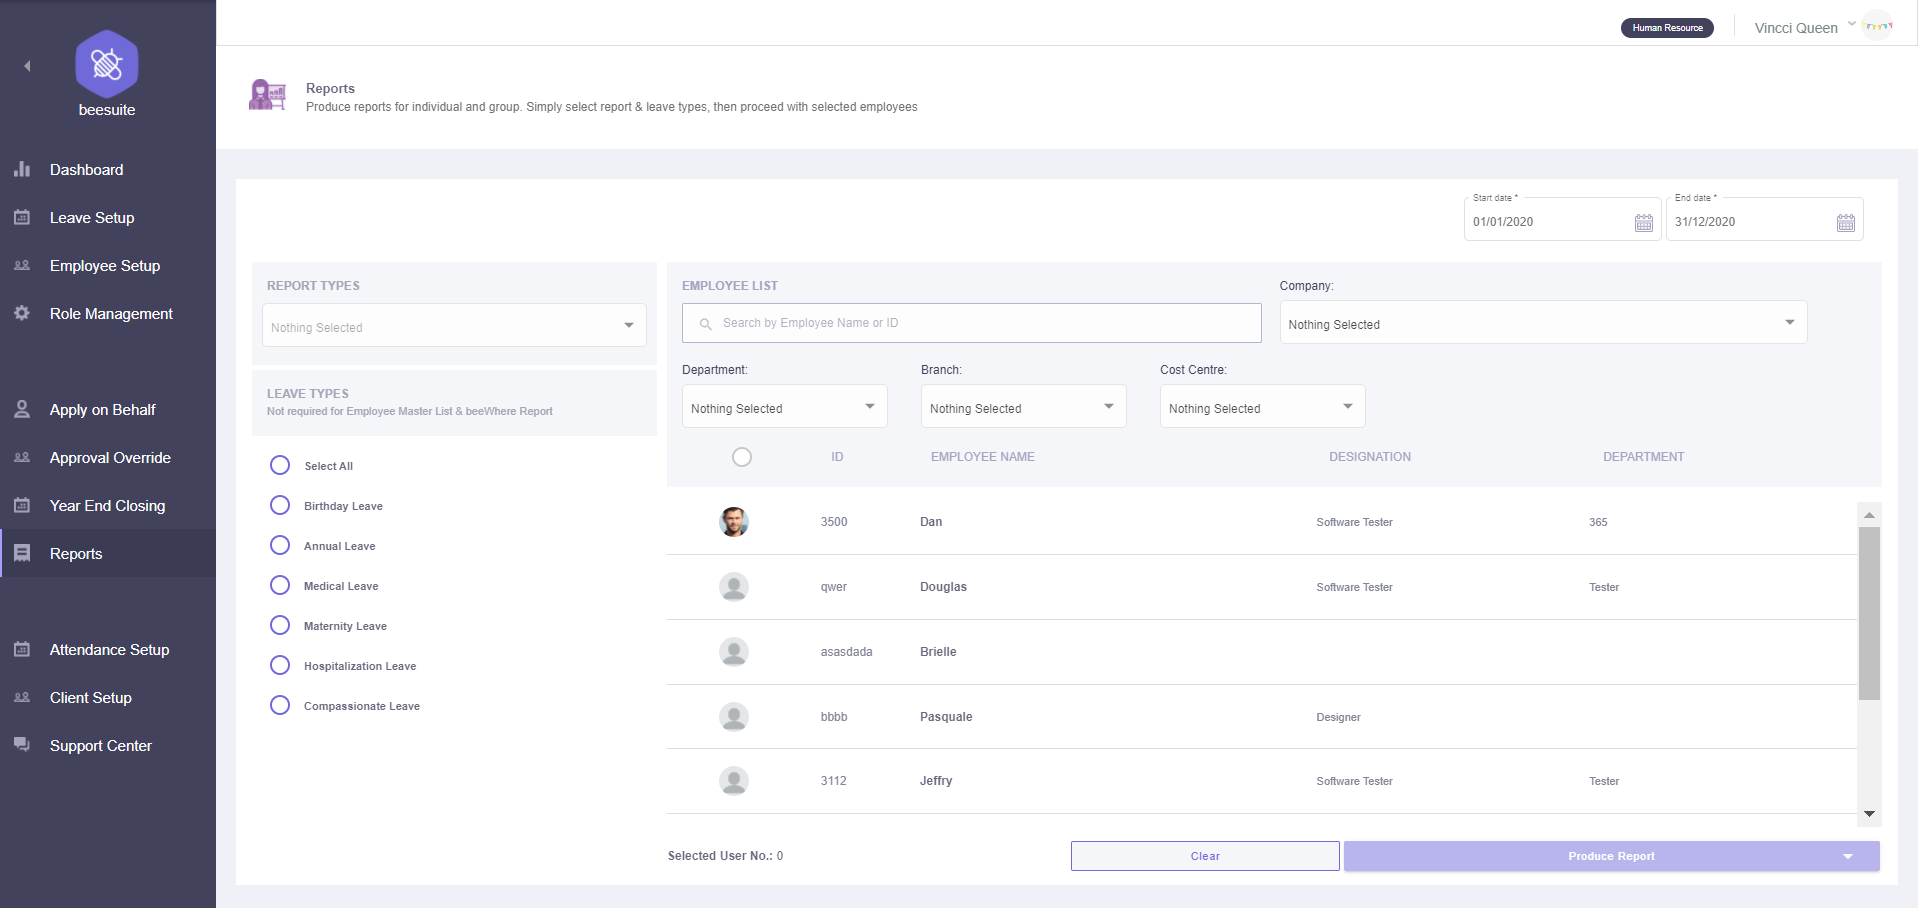
Steps to produce a report table:
Select report types
Select leave types to show in a report
To find employee. Filter employee or ID, company, department, branch or cost centre
Tick employee
Click Produce Report button. Select Group By company, department, branch, cost centre or no grouping option
Preview report table for All and other grouped data
Select Save as PDF or CSV for all grouped data at top-right corner table
Click Back To Main button to create another report. Repeat step 1 to 7
Attendance Setup
Create the attendance profile to assign specific job type & their rights to view certain list.
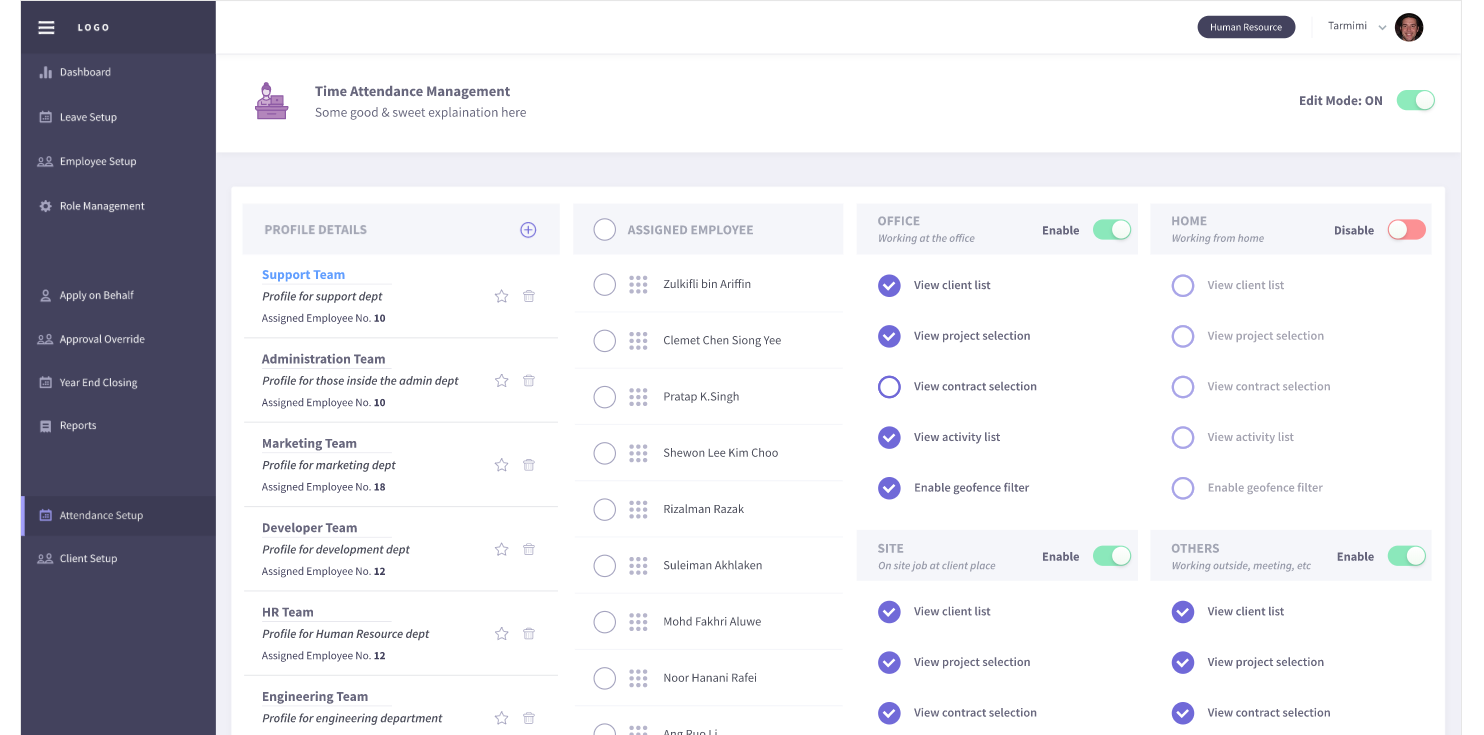
There have few features of attendance setup when the Edit Mode toggle button is turned ON.
Create New Profile
Click on the add icon at the Profile Details tab. From the slide-in menu, enter the new attendance profile name & its description. Then, click Create button to complete creation.
Edit Profile
Click on the pencil icon in the profile list to edit the Profile Name & Description. Simply toggle the Enable/Disable button for each job type (Office / Site / Home / Others) to enable/disable job type show in the employee’s beewhere application. Configured the client list, project list, contract list or activity list to be show in beewhere by tick or untick on the setting.
Delete Profile
Click on the trash icon to delete profile from the list.
- NOTE:
Please re-assign all the employees under that (to be delete) profile before delete.
Set as New Default Attendance Profile
Shaded star icon is the current default profile. You may change it by clicking on other non-shaded star icon from the list and click Yes button in the confirmation pop-up to replace original default profile.
Re-assign Employee to another Attendance Profile
Select a profile with assigned employee. To move only one employee, drag at the nine-dots icon of employee name box and drop into the attendance profile box you wish to; To move multiple of employees, tick on the employees and click on ellipses(three-dots) icon then select the attendance profile you wish to.
After edit the profile, toggle OFF Edit Mode to save.
Client Setup
Create the client profile details with project, contract and the location

There have few features in this page. Simply click on the client name to see the project name list, contract list & location list at the right-side column. To configure the client details, toggle ON the Edit Mode button at the right-top corner.
Create New Client Detail
Click on the add icon at the Client Details tab. From the slide-in menu, enter the Client Abbreviation & Name, project details, contract details and also locations. Then, click on the Create New button to save this new client details.
Edit/Update Client Detail
Click on the pencil icon on the client list, simply edit the details from slide-in menu and click Update button to save the changes.
Delete Client Detail
Click on the trash icon to remove unwanted client detail from the list.
After completed configuration, toggle OFF Edit Mode to go back to view mode.
Support Center
Manage request & suggestion from employee

View all the request & suggestion from employee in this page.
Reply For a Suggestion
Simply check the message and write a comment. Then, click on the button of update (will consider to handle / improve), reject (not going to handle / improve) or close (handled / improved successfully).
Reply For a Request
Enter the comment and click on the reject (reject the request), ask for clarification (request employee to clarify) or approve (approve the request) button.